
The Long Trail (LT) was the first long distance trail ever established in America, and it’s also one of the most rugged with steep ascents and long spells of wet weather. The LT traverses the entire state of Vermont – from the border of Massachusetts to the border of Canada – and hits many of the major peaks in the state.
Every year hundreds of hikers set out to complete an end-to-end hike on this trail, and they’re rewarded with sweeping views of the Green Mountains and White Mountains of New Hampshire, spectacular fall foliage in the later months, and a journey they’ll surely never forget. In this guide, we’ll outline everything you need to know to have a successful hike on the Long Trail.
Have you completed an LT end-to-end hike or are you planning to go for it? Let us know in the comments below!
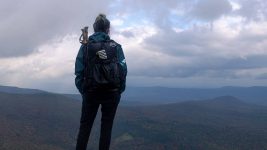
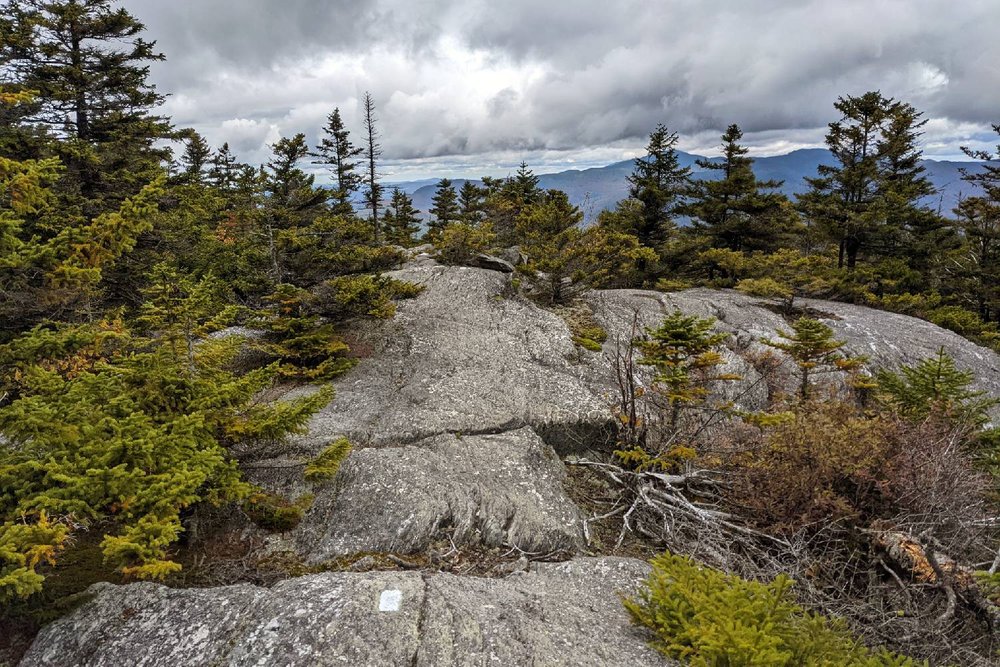
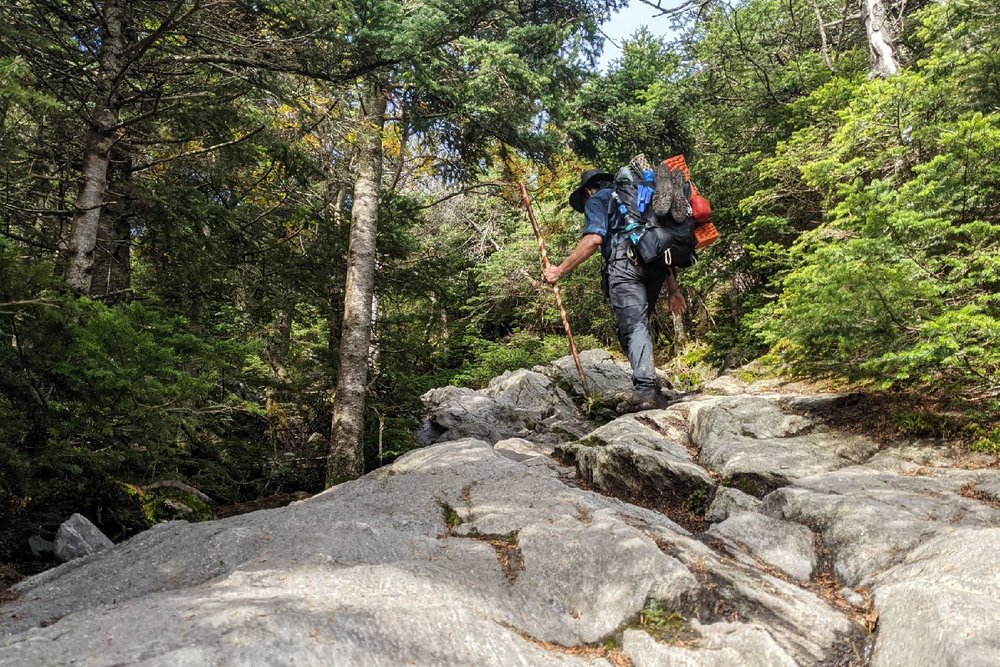
THE 272 MILE LONG TRAIL TAKES YOU THROUGH DENSE FORESTS & ABOVE TREELINE FOR VIEWS OF THE GREEN MOUNTAINS
Quick Facts
-
Distance: 272 miles (plus a few extra for the approach trails at the beginning and end)
-
Days Needed: 19 to 28 days (seriously fit and experienced hikers may take less time, but you really need to know your limits – this is a very tough trail)
-
Peak Elevation: 4,389 ft. – Mt. Mansfield, Vermont’s highest point
-
Low Elevation: Around 300 ft.
-
Elevation Gain/Loss (approx.): 63,500 ft./63,600 ft (south to north)
-
Best Time: June to mid-October (the Green Mountain Club [GMC] requests that hikers start after Memorial Day to avoid the peak of Vermont’s mud season)
-
Permits: None
-
Difficulty: Strenuous
Highlights
-
Well marked and maintained trail
-
Shelters and privies along the entire route
-
Frequent road crossings make it easy to resupply or do section hikes
-
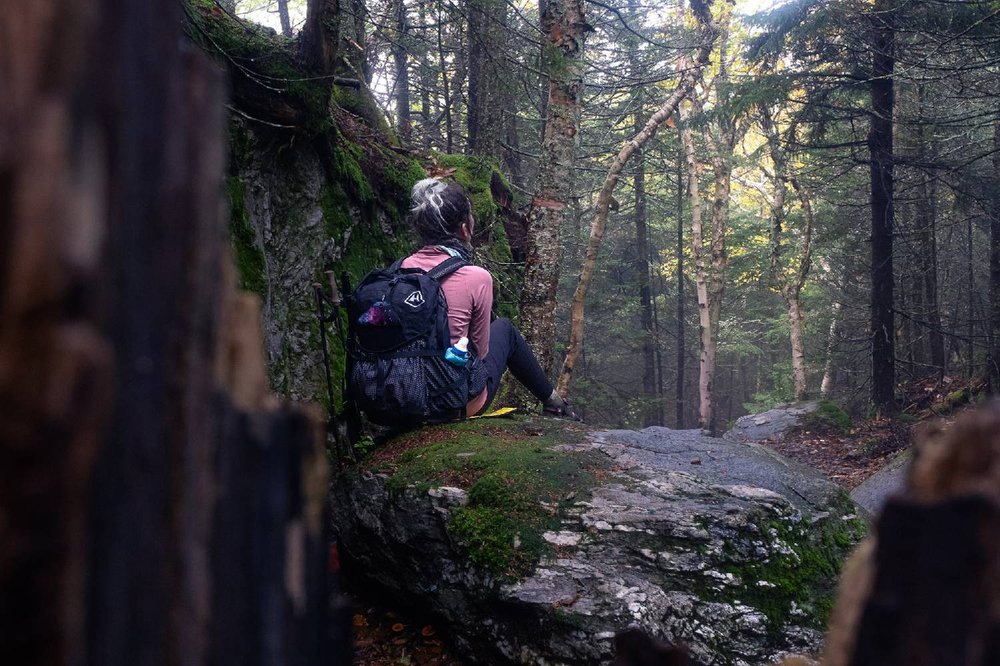
Dense forest with a lot of unique flora and fauna (bears, moose, owls, mushrooms, berries, etc.)
-
Water is plentiful
-
Mild temperatures (avg. high temp: 70’s for the height of summer, 60’s for early fall/avg. low temp: mid 50’s in summer, high 40’s for early fall)
-
If hiking northbound, terrain becomes progressively more difficult so you get a good warm-up before tackling the toughest mountains
-
Social and friendly trail community
-
Feeling amazingly capable and confident at the end of the journey
-
Summiting Vermont’s highest peaks with beautiful views of the surrounding mountains
You’ll summit most of Vermont’s major peaks on the Long Trail
Lowlights
-
Vermont can be VERY muddy – especially in high snow years
-
Strenuous ascents and descents
-
Ticks, mosquitos, and black flies can be annoying at times
-
Trail can be a little crowded – particularly the first 100 miles, which coincide with the Appalachian Trail
-
Big, sweeping views are few and far between
-
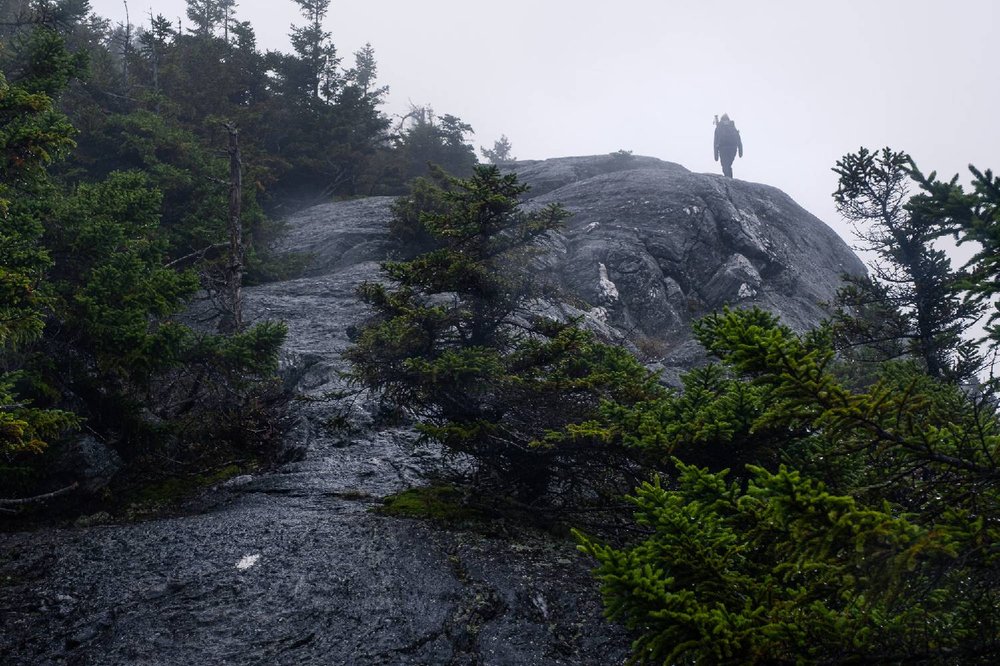
Depending on the year, you may encounter long periods of rainy weather
You may encounter long periods of wet weather and dense fog on the Long Trail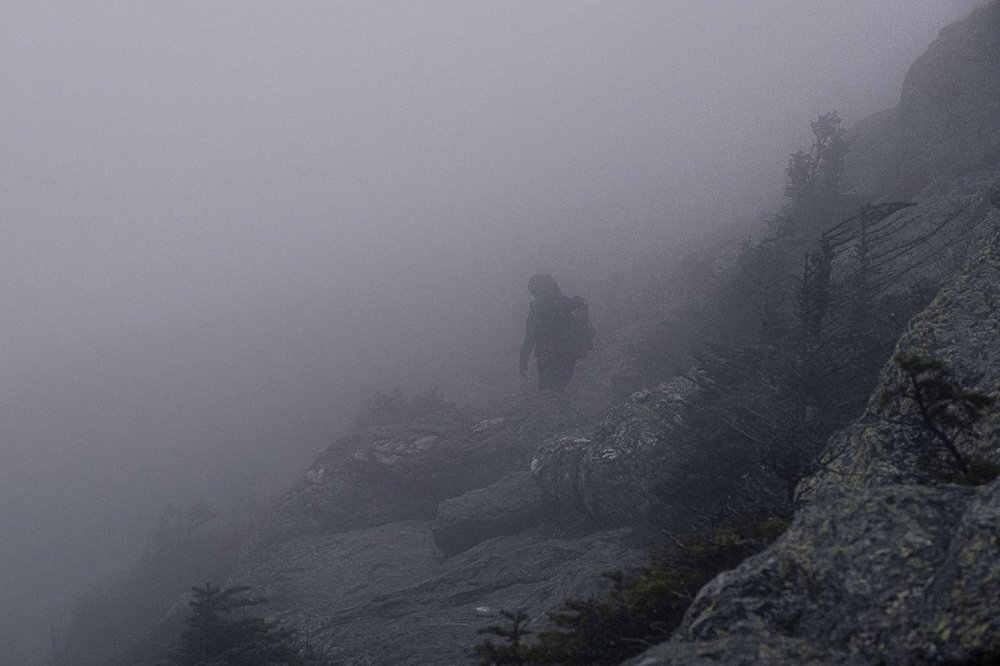
Best Time to Hike
The Green Mountain Club (GMC), which maintains the Long Trail, requests that hikers wait until after Memorial Day to start their end-to-end hike. This is because snowmelt causes the trails in Vermont to become extremely muddy, and foot traffic during this period can result in substantial erosion. Although it’s possible to hike the LT as early as June, we think it’s best to wait until September. A September start will mean less bugs, less mud (although you’ll likely still encounter a ton of mud), avoiding crowds on the AT section, more mild temperatures, and beautiful fall foliage.
Fall can be a little cold & wet on the LT, but you’ll get to see fall foliage
How Long Does It Take?
The average time it takes to complete the Long Trail is about 3-4 weeks. While some very experienced backpackers may be able to hike the trail in less time, the terrain and elevation gain in the Green Mountains make big-mile days pretty difficult. Most people calculate in a few “nero” and “zero” days (rest days) and take the trail at an enjoyable pace.
You’ll want to plan for a couple of zero days (no hiking) to rest, do laundry, and enjoy some town food
Difficulty
The LT is well-maintained, well-marked, and easy to follow, so navigation is rarely an issue. The main difficulties of the LT are the terrain, the steep grade, and the length of the trail.
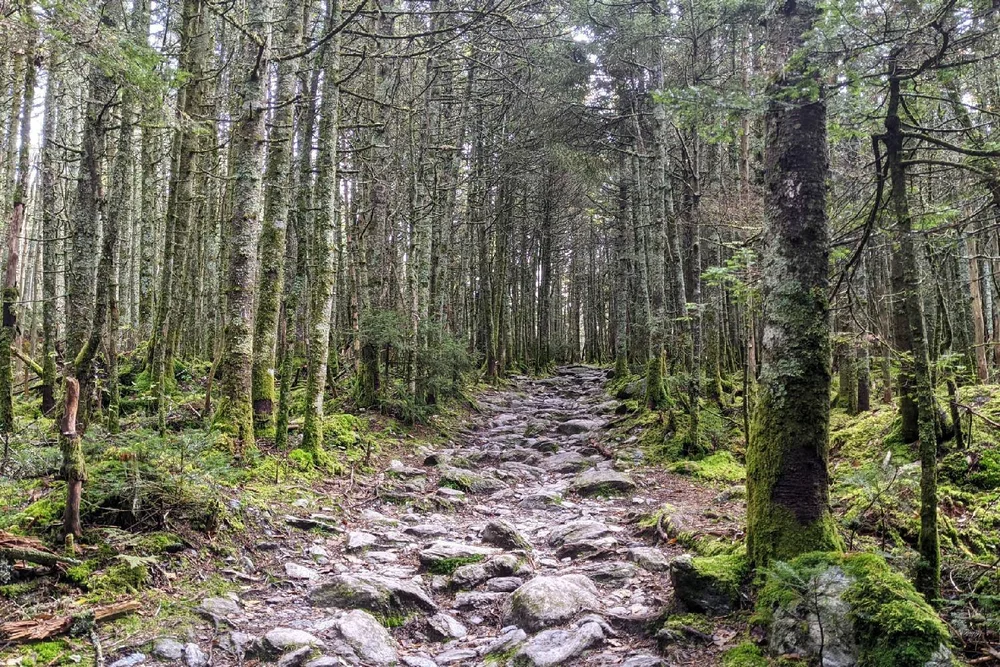
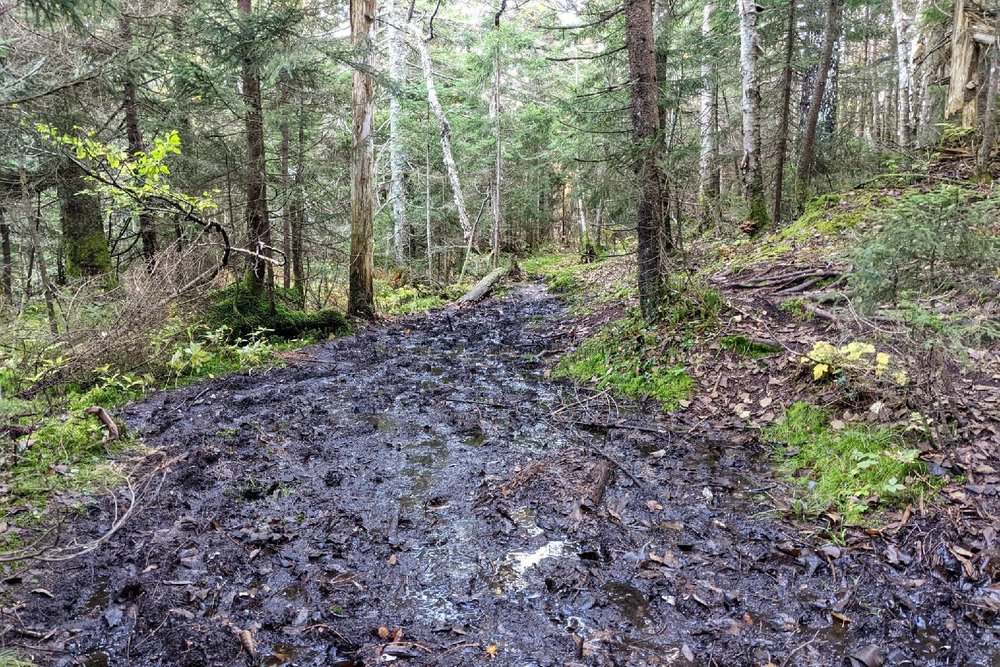
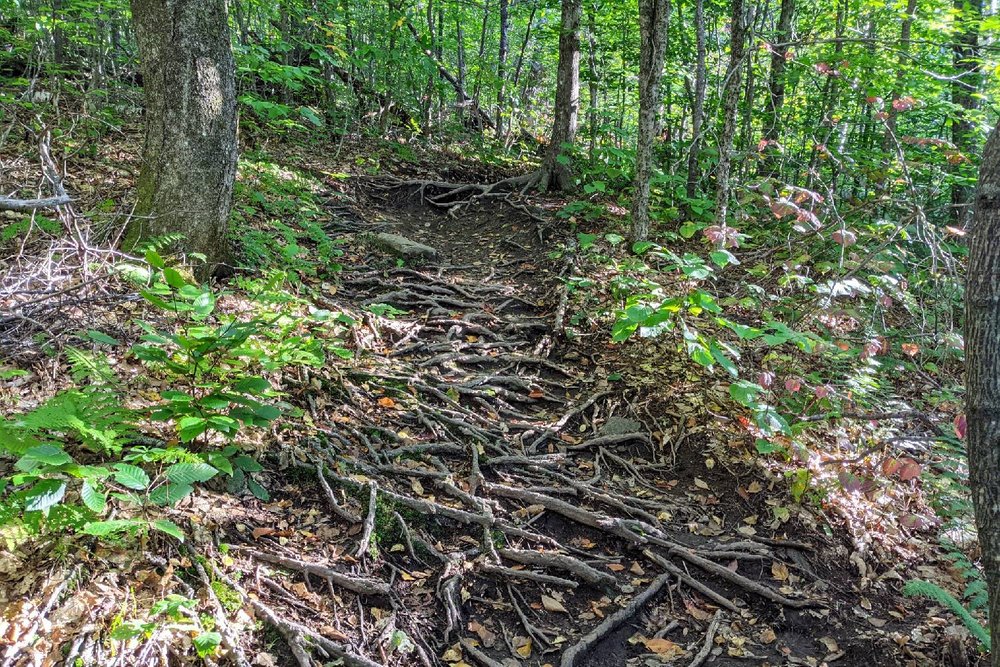
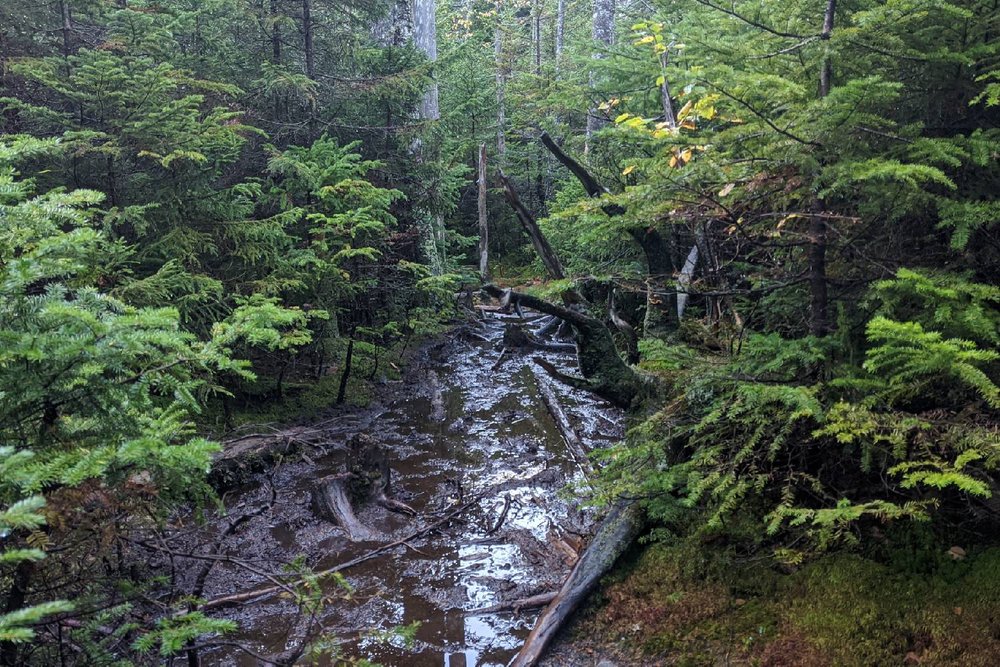
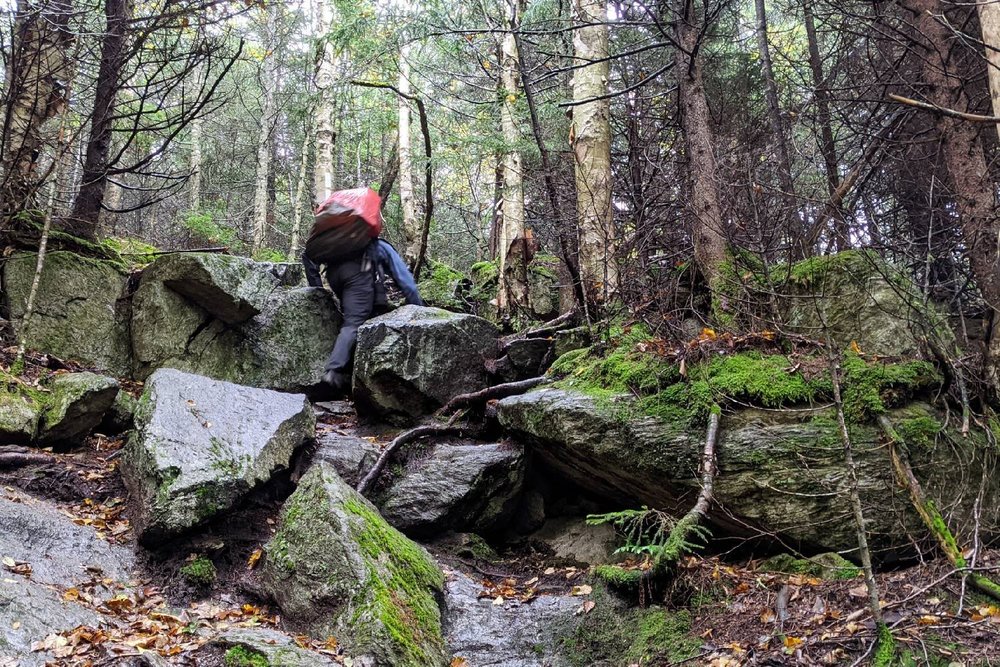
TERRAIN – The LT is extremely muddy in all but the driest of years. This means you either have to spend extra time rock-hopping to avoid wet feet, or you trudge straight through and have eternally soggy tootsies. The rare dry miles are often riddled with roots, loose rock, or slick granite slabs, so the terrain is challenging for the majority of the 272 mile trek.
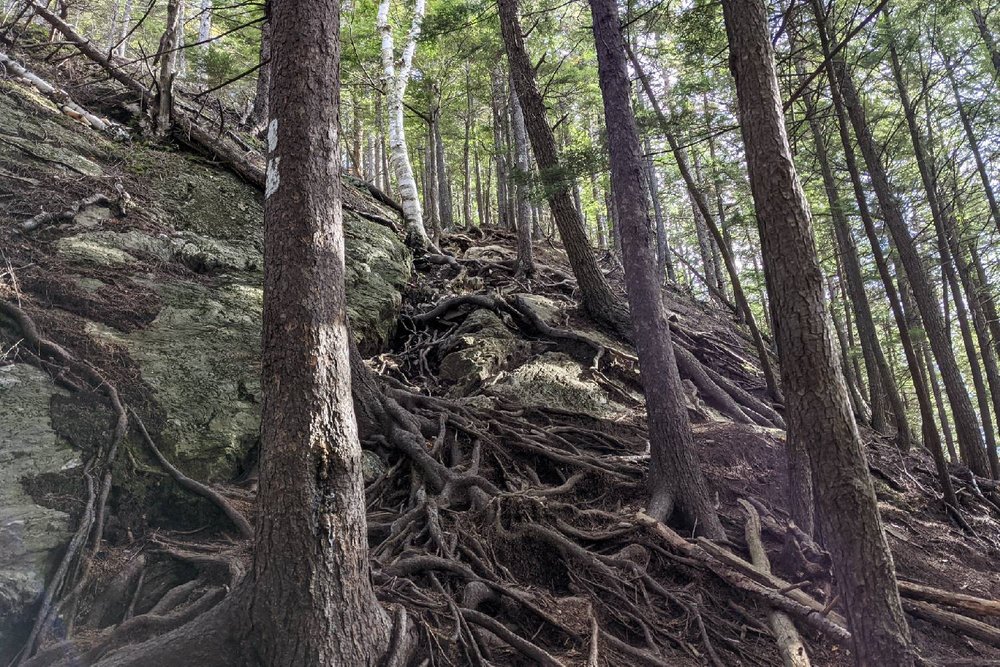
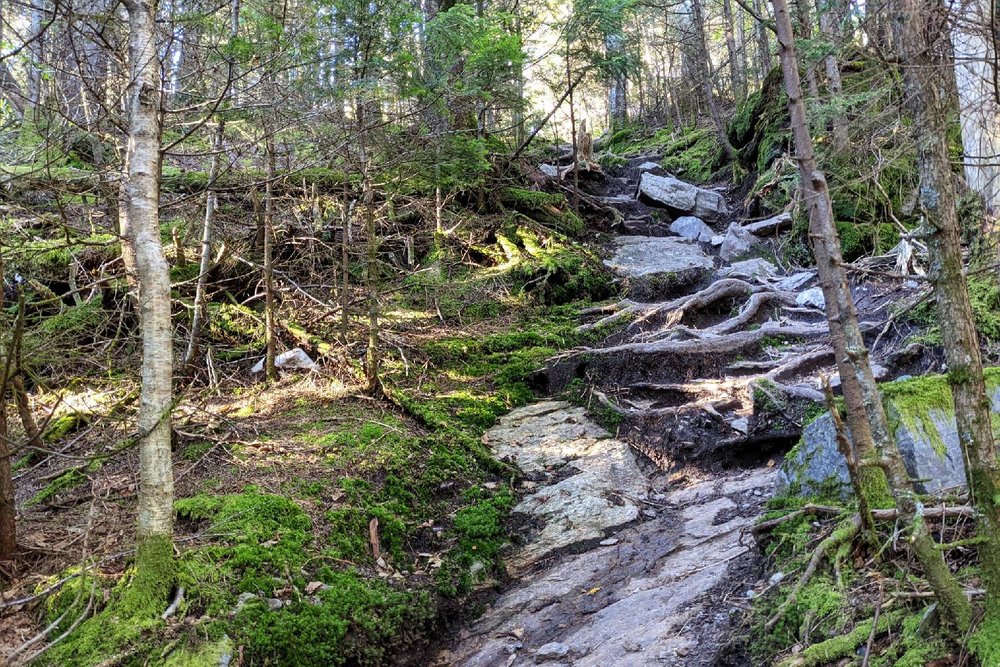
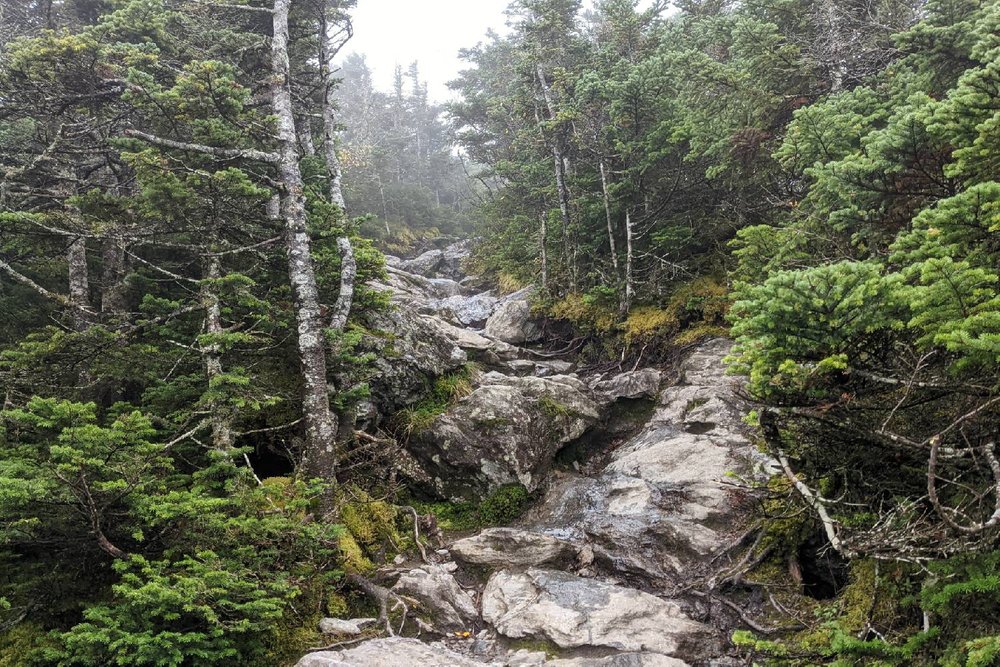
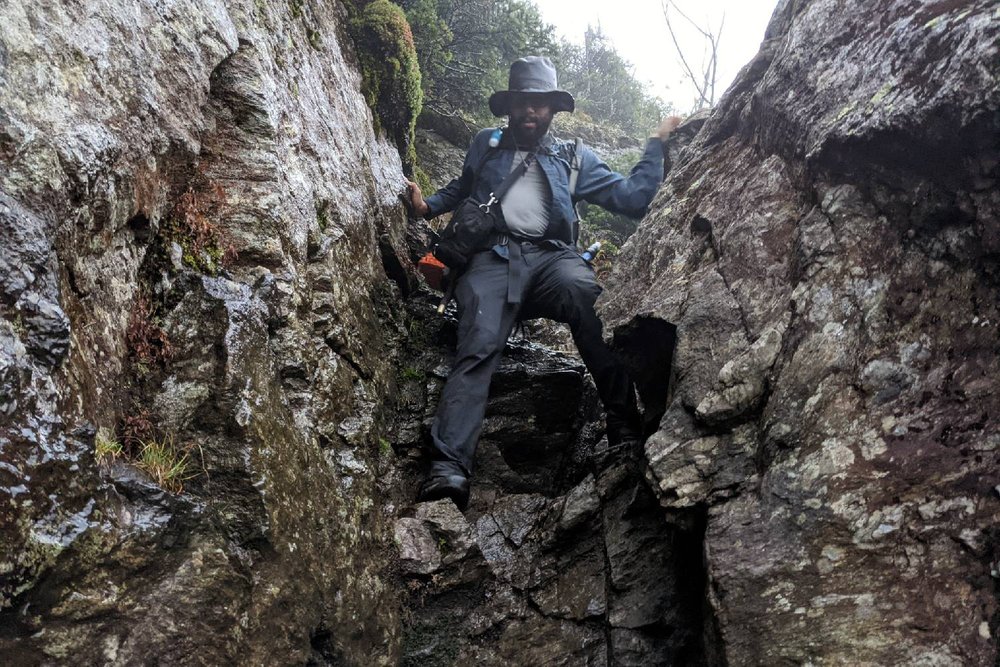
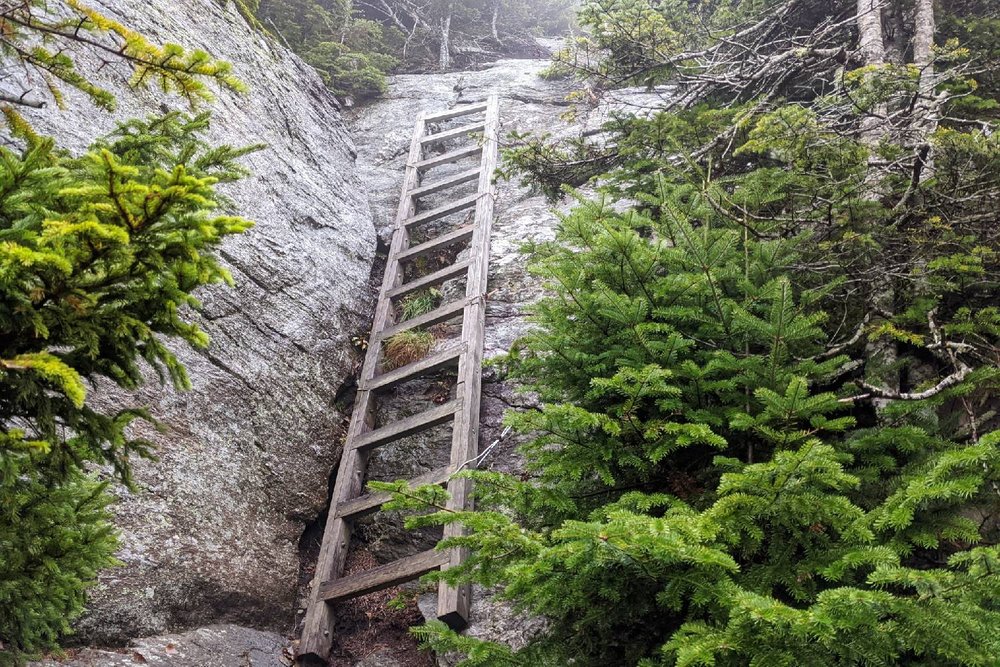
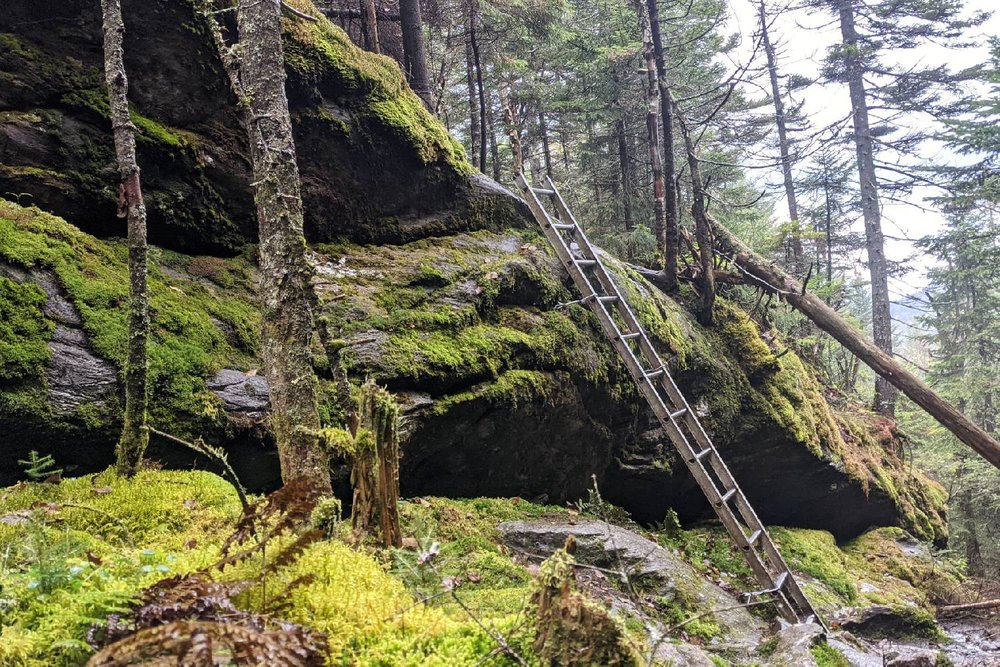
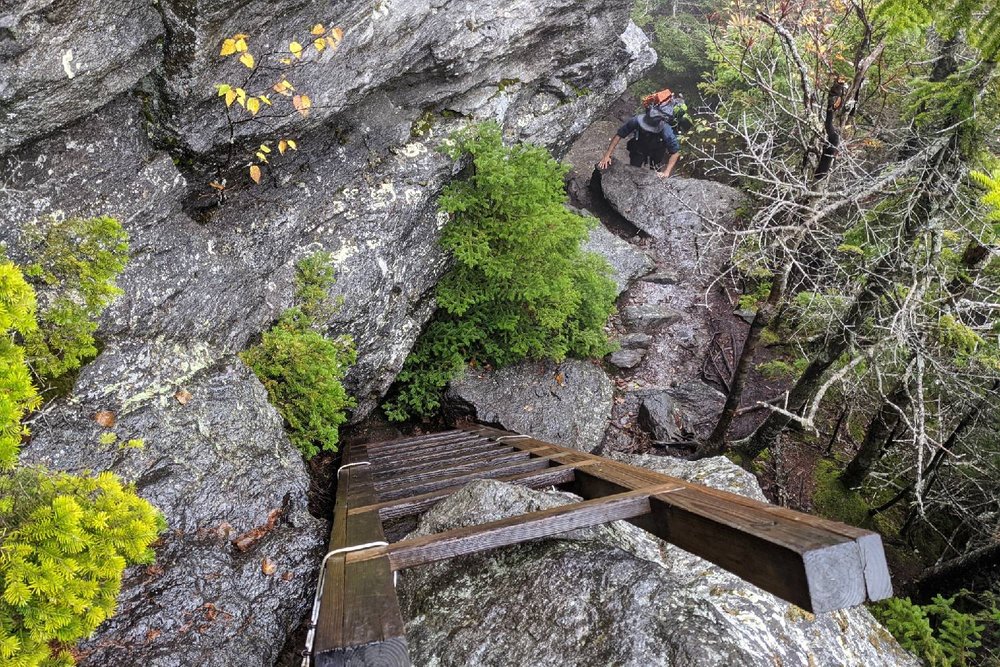
STEEP GRADES – The ascents and descents on the LT are often steeply graded. It sometimes feels as though the trail goes to great lengths to find you the absolute steepest way up to a peak. In the northern half of the LT, some ascents and descents will feel a lot more like a day at the bouldering gym than a day on a hiking trail. You’ll need to do some hand-over-hand climbing at times and you’ll have to navigate metal rungs and wooden ladders bolted into sheer rock faces. It’s important to be prepared for the difficulty of these climbs, but they’re very manageable if you take your time. You’ll get to enjoy a great sense of accomplishment every time you’ve finished one of these more challenging peaks.


TRIP LENGTH – Another important thing to think about is the length. Not only is hiking a 272 mile trail a large physical challenge, it’s also a big time and financial commitment. We typically like to budget $2-$3 per mile for a thru-hike, and we recommend letting your family and workplace know about your plans as far in advance as possible to arrange for time away. Not everyone is able to take time off from their job for so long, nor does everyone have the freedom to step away from commitments. Many people choose to complete the trail in smaller sections.
Hikers typically take about 3-4 weeks to hike the Long Trail in one go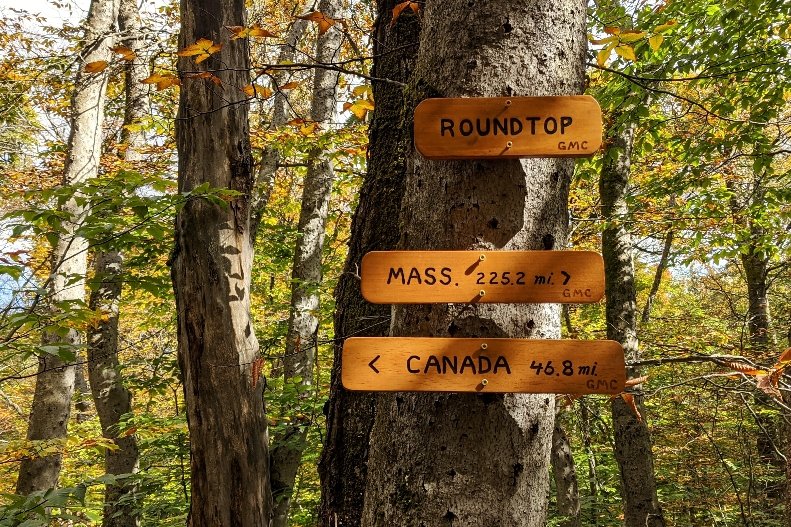
Permits/Fees
Permits are not required to hike the Long Trail, but there are a few shelters along the way that ask for $5 for overnight stays. This fee goes to the GMC, and it’s used to maintain the dozens of shelters, privies, and campsites along the trail. The fee is waived if you’re a GMC member; we’ll talk a little more about why we recommend becoming a member of the GMC a little later in this guide.
Northbound (NOBO) VS Southbound (SOBO)
Northbound (NOBO) is the more common direction to go on the LT, but a southbound (SOBO) hike also has plenty of benefits. Below we’ll list the main pros and cons of going either direction to help you decide which is best for you.
Whether you go NOBO or SOBO will depend on things like transportation, your starting date, and how social of an experience you want to have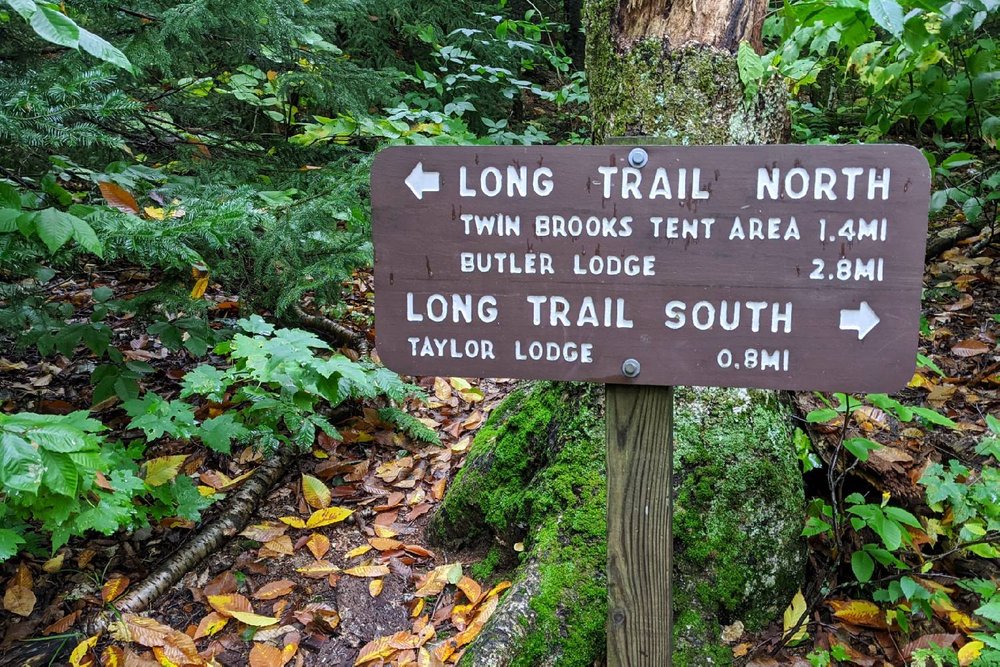
NOBO
PROS
-
The southern terminus is located up a three mile trail from a well-populated part of Massachusetts – arranging a ride to your starting point is much easier on this end
-
The first half is easier hiking than the second half, so you’ll have time to build strength and dial in your gear before the toughest section
-
There are more people on trail to interact with if you’re looking for a social experience
-
Ending at the Canadian border can feel more epic than ending at the Massachusetts border
CONS
-
The trail and shelters can be crowded, and it may be more difficult to find lodging for rest days in town when you have to compete with all the other NOBOs
-
Getting transportation back home from the northern terminus can be tricky
-
If you’re starting later in the fall, weather may get more cold and unpredictable as you get further north
Weather can get colder and more unpredictable as you go north – especially if you start later in the season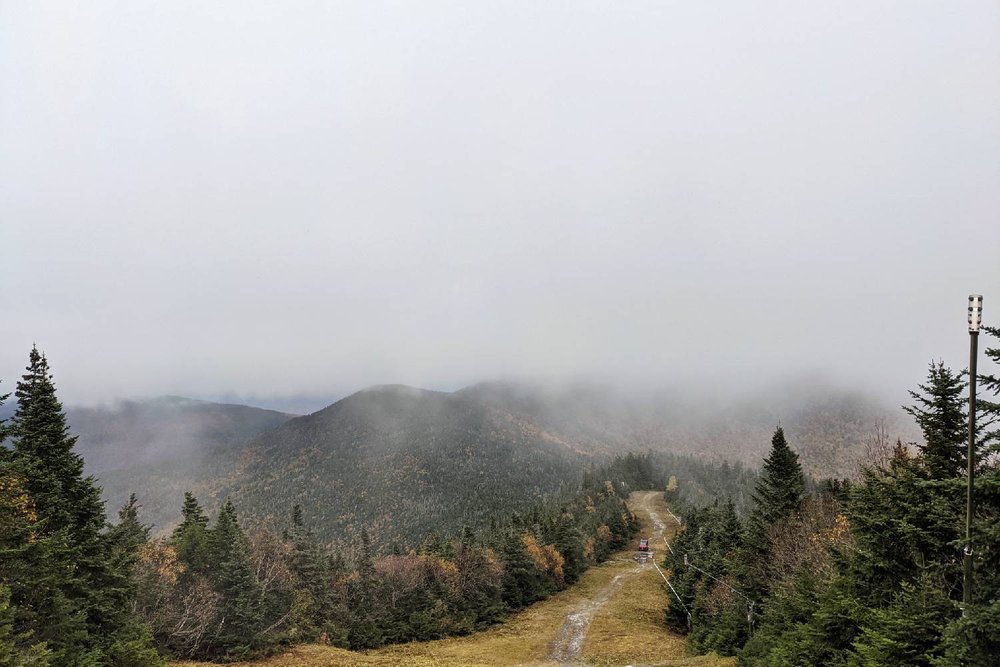
SOBO
PROS
-
The trail and shelters are less crowded, and you may find it easier to find lodging in town for rest days
-
There are more transportation options to get back home from the southern terminus
-
Depending on the month you start, you may be hiking in ideal temperatures the whole way down
-
You get the challenging parts out of the way first, so the last half may feel more relaxing
CONS
-
Less people to interact with if you’re looking for a social experience
-
Transportation to the northern terminus can be a bit tricky
-
The northern half may feel more difficult for SOBOs because you start with the hardest climbs without getting a 100 mile warm-up
Transportation to Trailheads
NORTHBOUND – If you’re hiking NOBO on the LT, transportation options to the southern terminus are pretty abundant. We found that the most convenient and cheapest airport to fly into was Albany, NY, but some hikers choose to fly into Burlington, VT or other nearby airports. From Albany, we took a cheap Greyhound bus to Bennington, VT, which is about a 20 minute drive from the starting trailhead. Once in Bennington, there are a ton of options for private shuttles. Hitchhiking to the trailhead can also be relatively easy, and some motels (like the Catamount Motel, where we enjoyed a stay) offer rides to the trailhead for paying customers.
the Pine Cobble Trail just outside of Williamstown, MA is one approach trail option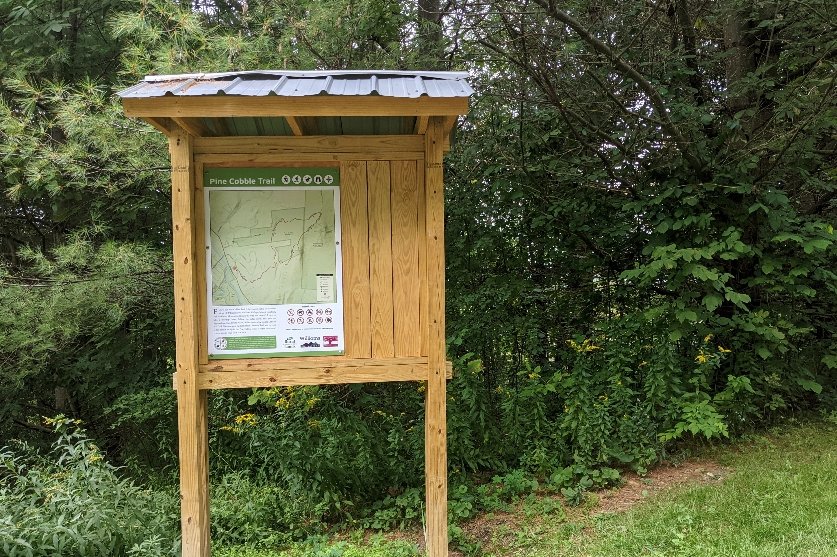
SOUTHBOUND – If you’re hiking SOBO, the most ideal situation would be having a friend or family member drop you off at the northern terminus. If that’s not an option for you, your best bet is probably flying into Burlington, VT, then taking a bus to Waterbury, Jefferson, or St. Albans, VT and calling a private shuttle from there. You could do a private shuttle all the way from Burlington, but it’s a long distance, and the added cost may not be worth the time saved.
The northern terminus is in a very remote part of Vermont on the Canadian border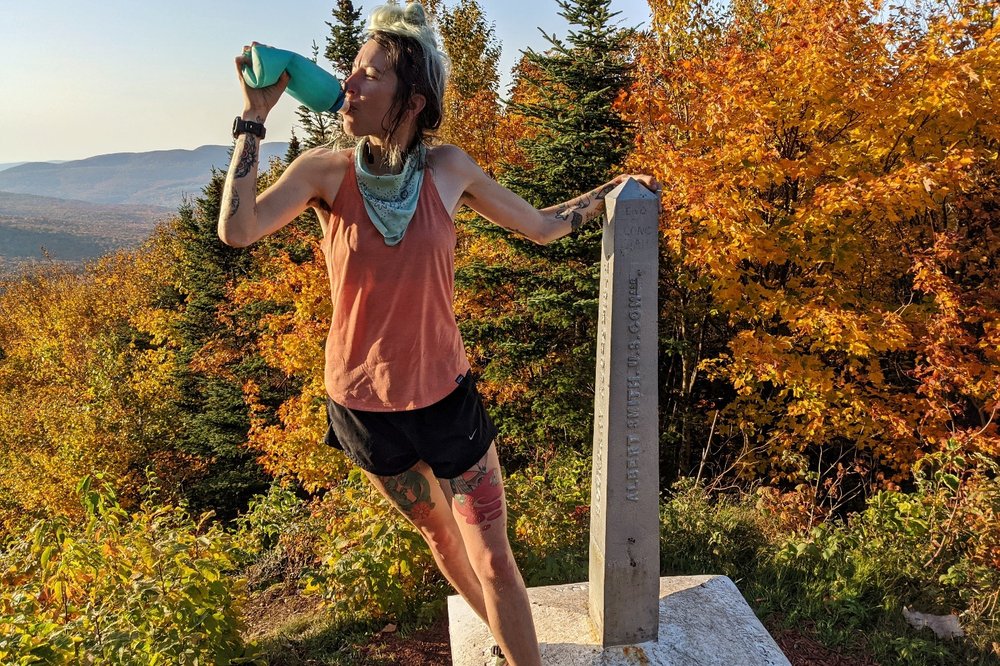
Planning Your Itinerary
Planning a loose daily itinerary isn’t necessary, but we’ve learned from completing multiple thru-hikes that it’s very helpful. Most people take about three weeks to complete the LT, with many averaging around 10-14 miles a day. That said, very fit and experienced hikers may cover 15-20 miles a day. In general, we always recommend overestimating your time on the trail. You can always get off the trail early, but it’s not as easy to extend beyond your planned finish date if you have obligations to return home to. Your itinerary should take into consideration your ability, personal preferences, hiking style, and zero days (no hiking) you may want to take.
Far Out is an excellent resource to use when planning your itinerary, because you can see how many miles there are between each shelter, what services nearby towns offer, and you can even read comments other users left about places they enjoyed visiting.
Long Trail Shelters, Campsites & Privies
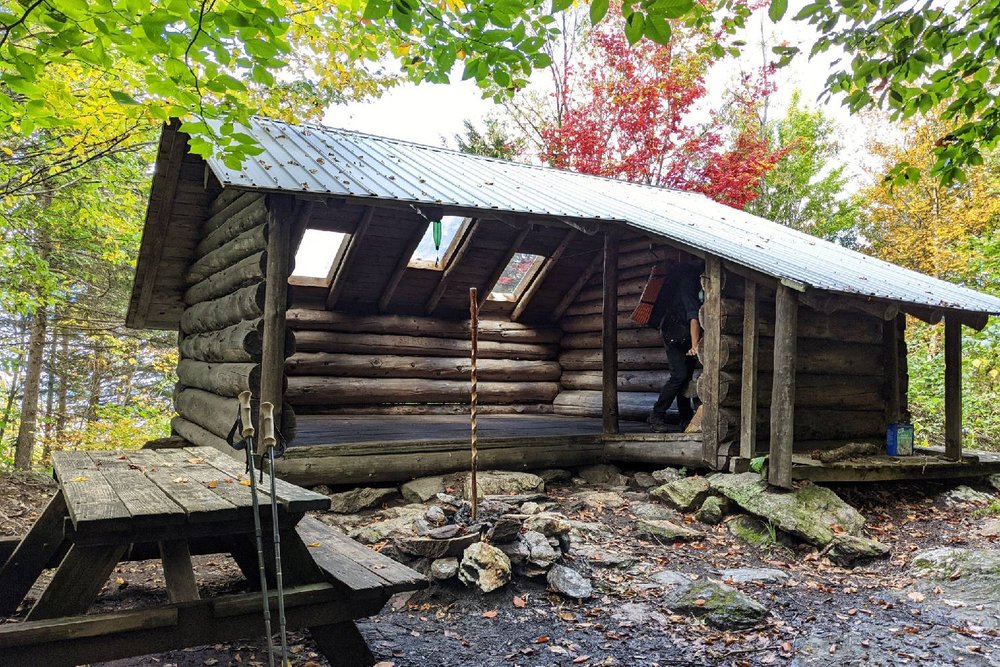
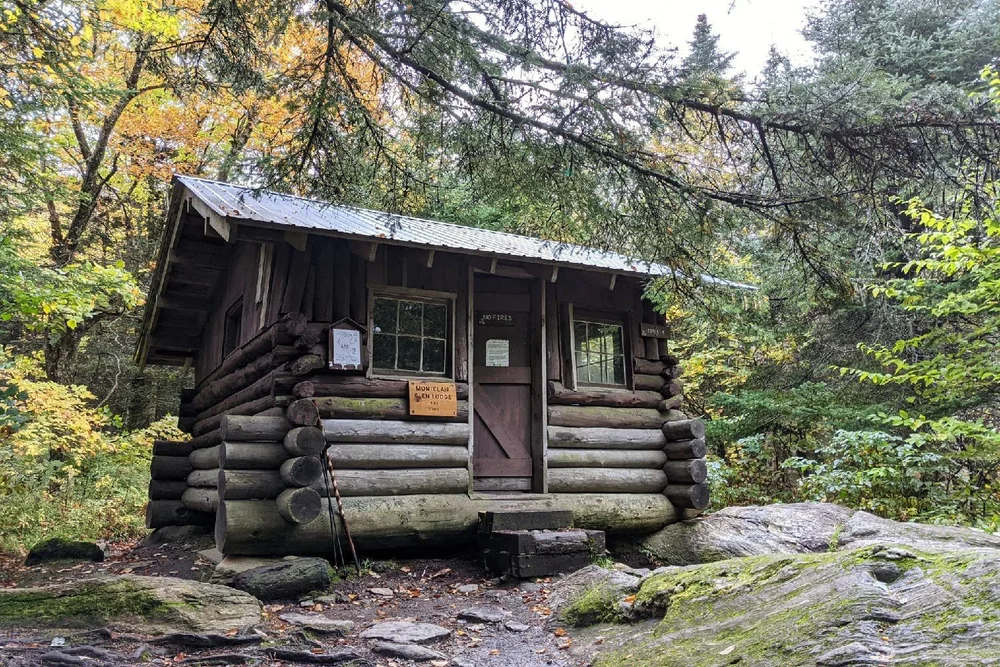
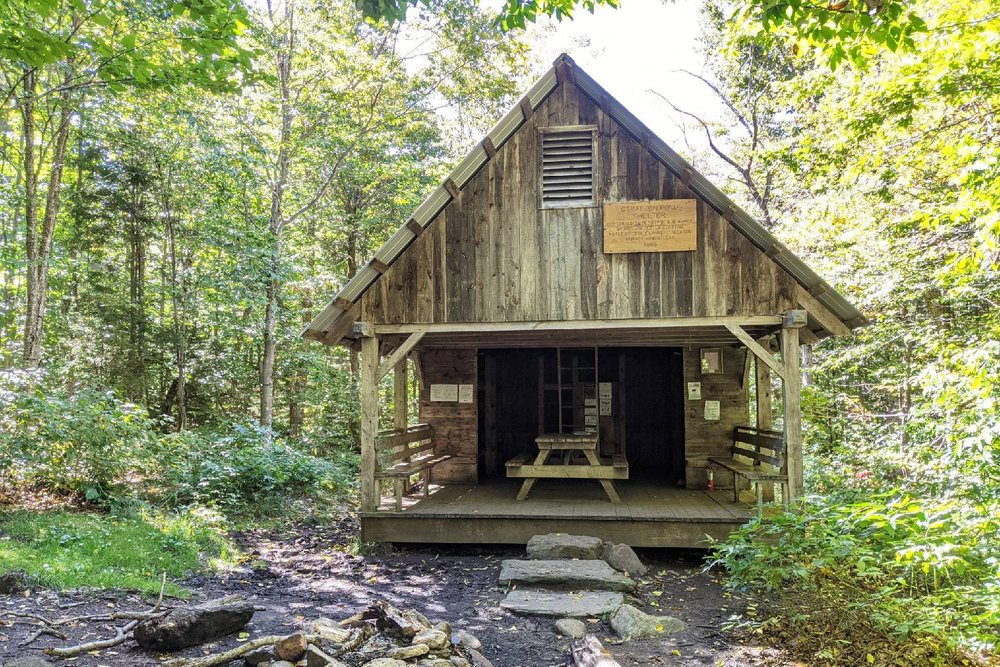
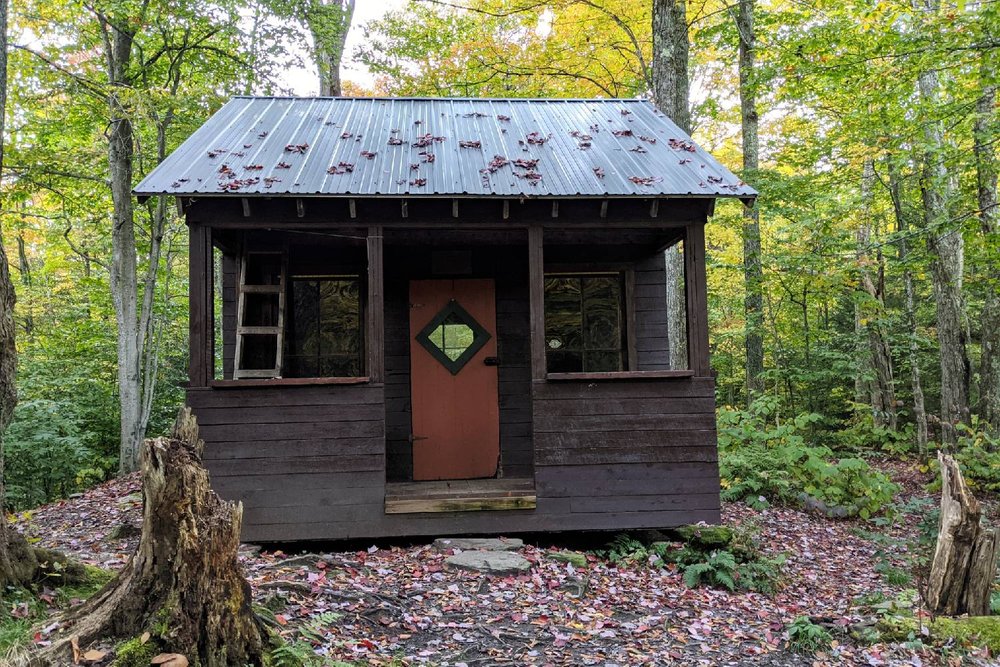
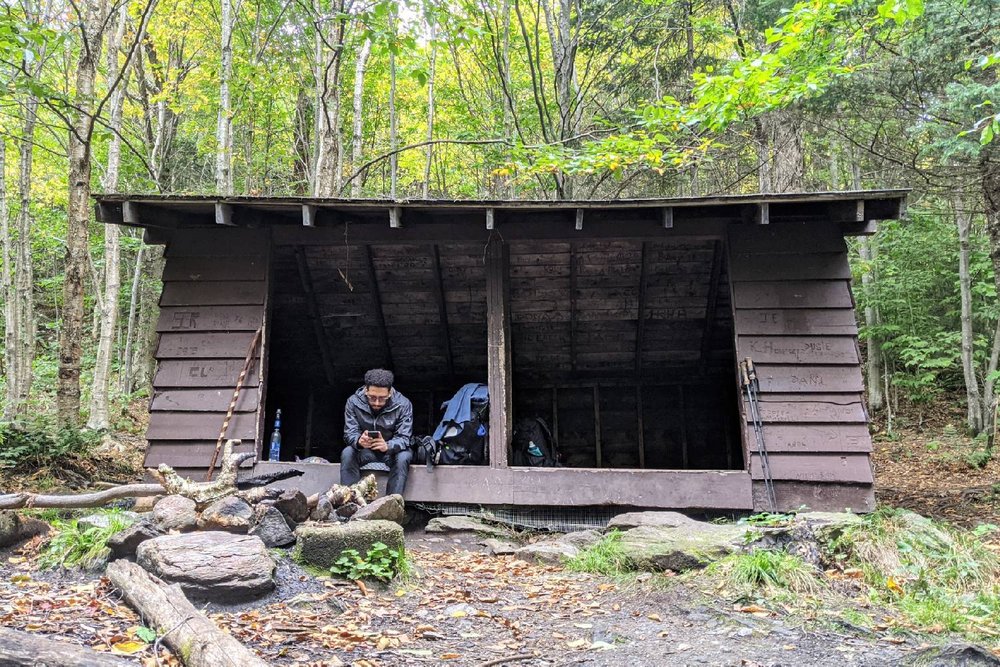
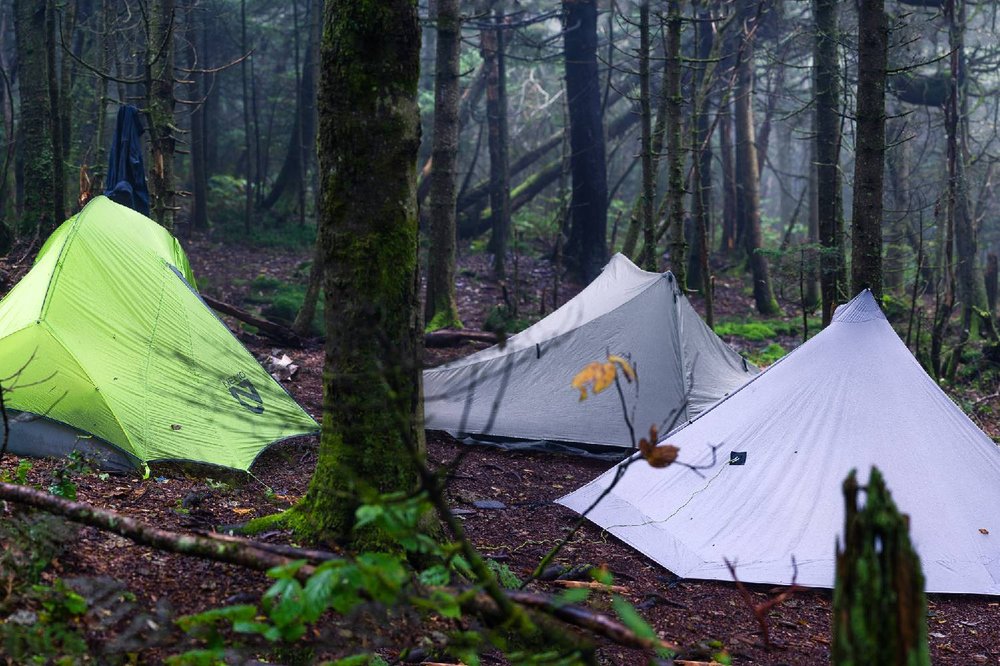
There are shelters – usually three-sided lean-tos, sometimes fully enclosed cabins – located every 5-10 miles or so along the LT. Most of them are free to stay at (some have a caretaker and ask for a $5 fee to help with maintenance costs), and they all have composting or mouldering privies nearby. Many shelters also have a fire pit, a picnic table, and flat ground or platforms for tenting close by. While it is possible to sleep in a shelter every night of your end-to-end hike, you shouldn’t rely solely on them. Shelters can fill up – especially in peak hiking season and during inclement weather – so you should also carry a tent or some other type of shelter with you in case there isn’t room for you inside or for if you run into an emergency.
The shelters can fill up fast during wet weather
The privies are well-maintained and many of them have lovely views. Make sure you pack in your own toilet paper, and follow all guidelines posted on the privy door (such as whether or not you can pee in the privy, throw in a handful of wood chips to “flush”, etc.). Be aware that in peak season, privies can also fill up. So it’s a good idea to have a wide tent stake or a trowel with you in case you need to dig a cathole when nature calls. Check out our How to Poop in the Woods post to learn proper backcountry bathroom etiquette.
There are privies near all of the Long Trail shelters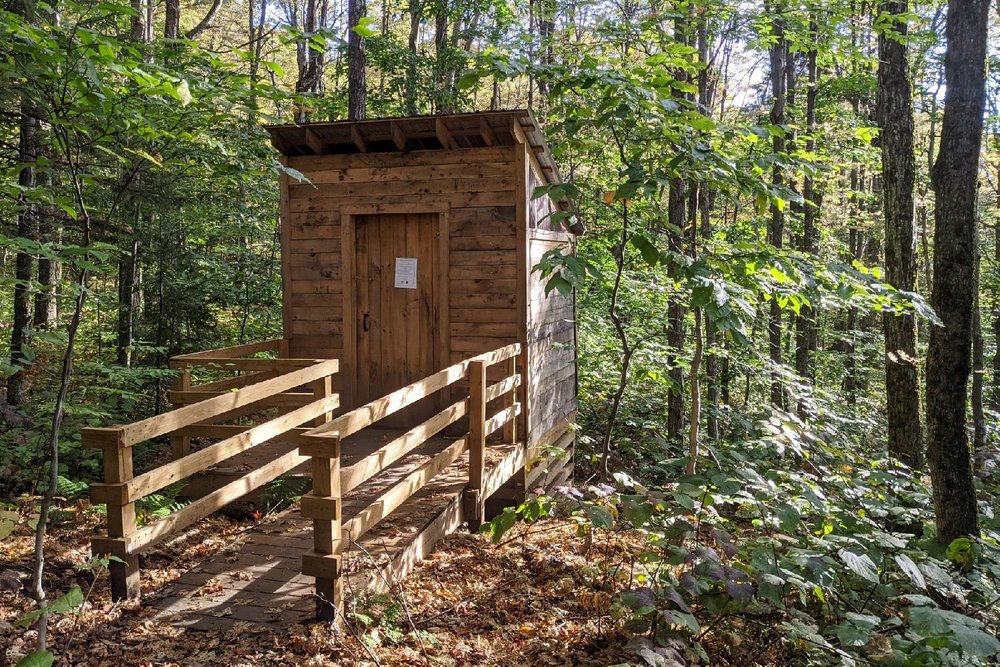
Resupply Points
Because you’ll be on the trail for a few weeks, you won’t be able to carry all your food in your pack. You’ll need to stop and resupply periodically along the trail. Most people resupply 4-5 times, but you can certainly do more or less depending on how often you want to go into town. Opportunities to get a ride to a grocery store are plentiful throughout most of the trail, so resupplying often is very easy if you want to cut down on food weight in your pack. Just be aware that town stops tend to take up a whole lot of time, so you’ll need to balance the convenience of carrying less food against the time you’ll lose on trail by making frequent stops.
You’ll need to stop in town every once in a while to replenish your snacks and meals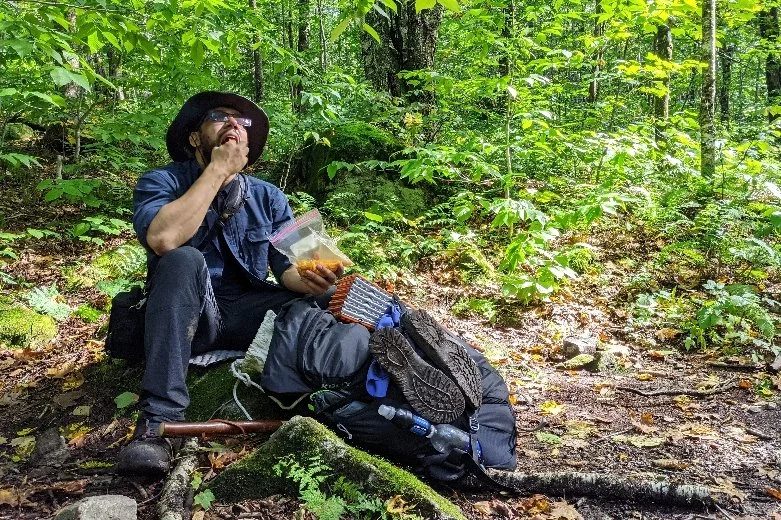
You can resupply by mailing boxes ahead of time to a post office or a place in town that offers to hold boxes for hikers (like a hostel), having a friend or family member meet you at road crossings with fresh supplies (we saw many hikers who traveled with a dog choose this option), or getting a ride into a nearby town for the grocery store.
If your resupply plan involves mailing packages, you’ll want to ship them well in advance to make sure they arrive in time for you to pick them up. For mailed resupply boxes to a post office, first make sure the PO in your target town accepts general delivery then address your box with the following:
Your Name
c/o General Delivery
Town Name, VT 01234
Arriving By: ETA
It’s also a good idea to write your name or put a special marker (like colorful tape) on all sides of the box to make it easier for postal workers to find it amongst all the other resupply boxes.
We chose to shop in towns for all of our resupplies during our hike. Below are the towns we stopped in:
Manchester Center (LT mile 54.4)
Stay here: Green Mountain House Hiker Hostel – this was one of cleanest and most hospitable hostels we’ve ever stayed at. The owners, Jeff and Regina Taussig, are hikers themselves so they know exactly what LT hikers need – like a freezer full of Ben & Jerry’s ice cream pints!
Eat here: Sam’s Woodfired Pizza
Resupply here: Shaws/The Mountain Goat (for gear)
Jeff Taussig is an amazing host at the Green Mountain House Hiker Hostel in Manchester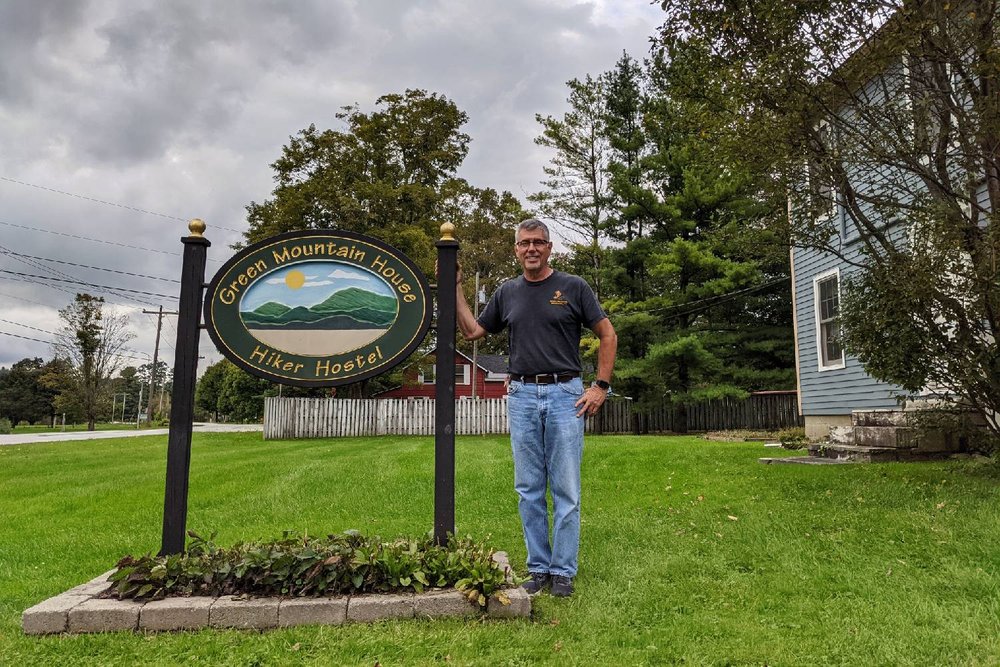
Rutland, VT (LT mile 104.5)
Stay here: Inn at The Long Trail – It’s easy to get here via a short side trail off the LT, or you can catch a free bus to it where the trail crosses Rt. 4. The rooms are cozy and the included breakfast in the morning is amazing. There’s also an Irish Pub inside the inn to grab a drink at and watch live music if that’s your thing. If you need to get into town for the grocery store, it’s easy to hitchhike from here or you can take the free bus to the town center.
Eat here: Brix Bistro
Resupply here: Price Chopper/Rutland Area Food Co-op (lots of vegan options)
The Inn at the Long Trail outside of Rutland serves a delicious breakfast that’s included if you book a room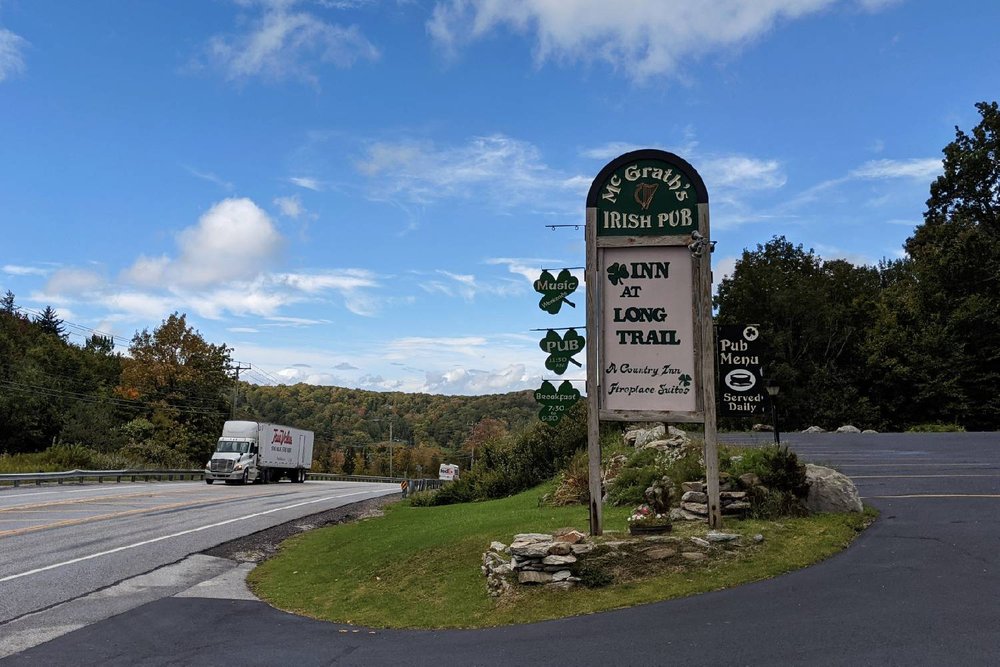
Waitsfield, VT (LT mile 163.7)
Stay here: Swanson Inn – We’re convinced that owners, Tim and Rick, are some of the nicest folks in the whole state. They offer rides to and from the trail, rides into town for resupply, a fantastic breakfast, and homey rooms inside a beautiful house.
Eat here: Mad Taco/Lawsons Brewery
Resupply here: Shaw’s
Tim and Rick run the extremely hiker-friendly Swanson Inn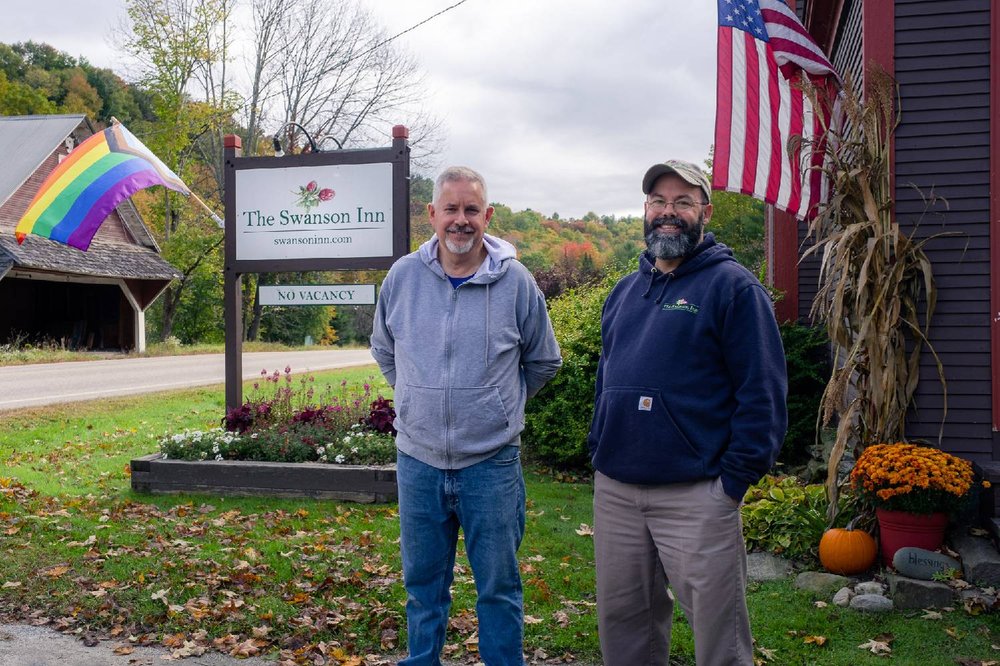
Waterbury VT (LT mile 184.6)
We didn’t stay the night in Waterbury, but it’s easy to get to. So we took a trip into town for the grocery store and some town food. Even if you plan to stop in Waitsfield (about 20 miles away), resupplying in both towns will allow you to carry a lighter pack for the tough climb and descent over Camel’s Hump.
Eat here: Blackback
Resupply here: Village Market / Shaw’s / Waterbury Sports (for gear)
We tried pretty much everything on the dessert menu at Blackback in Waterbury, and it was all delicious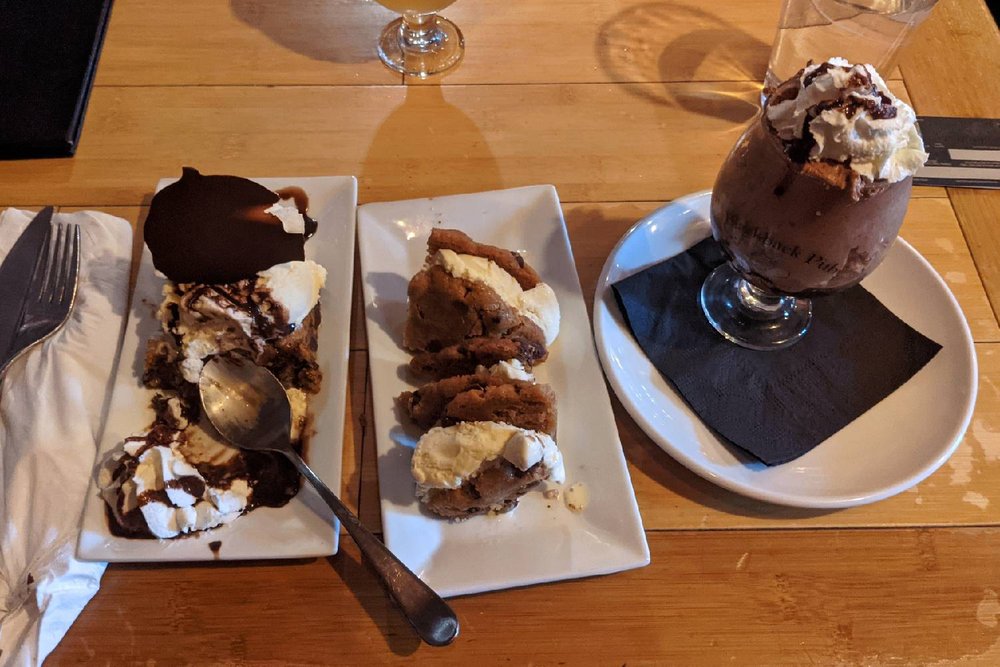
Johnson, VT (LT mile 221.6)
Stay here: Nye’s Green Valley Farm – This 1800’s farmhouse B&B is run by Marsha and David Nye. They offer a hiker rate, rides to and from town and the trail, they do your laundry for you, and they feed you an amazing homemade breakfast. This was a very comfortable and friendly place to stay before making the final push north to Journey’s End.
Resupply here: Sterling Market / Johnson Hardware & Rental (for gear)
Marsha and David Nye treat you like family at the Green Valley Farm B&B
Water
In general, water sources along the LT are plentiful – it’s rare you’ll hike more than a couple hours without hitting one. That said, some streams can go dry during long periods with no rain. Always check your map for water sources, consult with fellow hikers, or use the Far Out app for updates on current conditions. In general, it’s common to hike with no more than two liters at any given time along the LT.
Though many of the water sources you’ll find along the LT run clear and appear free of sediment, you’ll still want to filter your water. We used the Katadyn BeFree to filter water on the trail because it’s lightweight, fast, and easy to clean in the field. Another very popular and affordable option that many hikers use on the LT is the Sawyer Squeeze.
Water is plentiful along the Long Trail 
Bears & Food Storage
Black bears live in the forests along the entire Long Trail, so it’s important to take steps to keep yourself and these animals safe. Visitors to the Green Mountain National Forest (the majority of the Long Trail) are required to store food and other scented items in a bear box or a bear canister or to bear hang food at least 12 feet from the ground and six feet from any horizontal object. Many of the shelters on the LT have bear boxes nearby for safely storing your food.
Bugs
Ticks, mosquitoes, and black flies can be a nuisance on the LT, especially in the warmer months. Most bugs have dissipated by September, making it a nice time to hike.
We recommend using a combination of Permethrin on your clothing and bringing a small bottle of DEET or Picaridin Lotion (our choice) for exposed skin if you’re hiking during the peak of summer.
Bugs will be worse near the beaver ponds on the Long Trail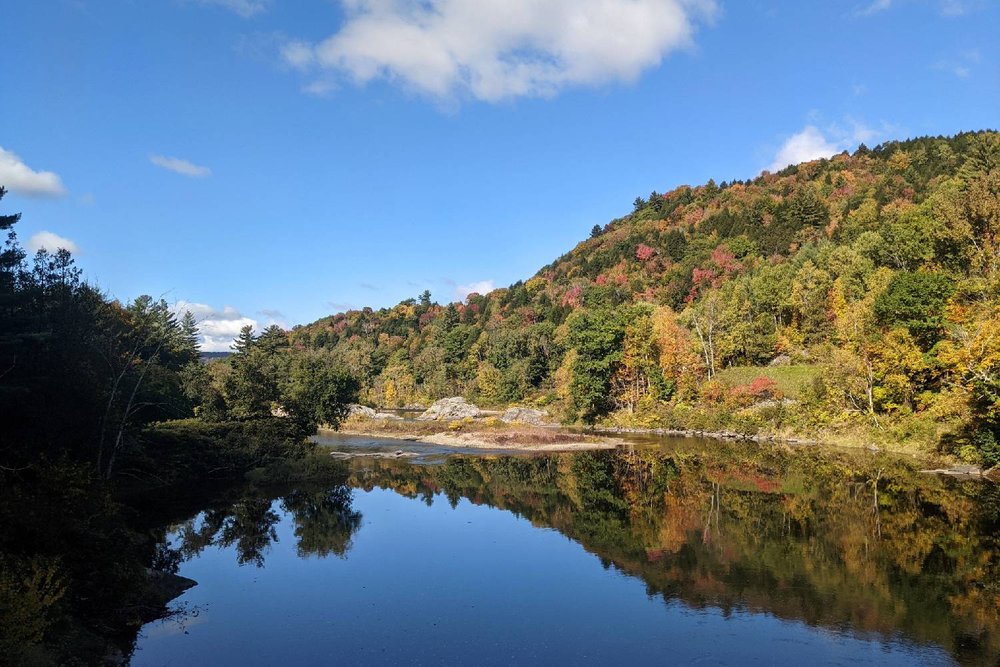
Leave No Trace
Preventing and minimizing human impact is crucial to the health of our wilderness. Individually, you may think that your fire, shallow cathole, or food scraps in the river aren’t going to harm an ecosystem, but there’s a large cumulative impact.
We share this space with thousands of people hiking along the LT corridor every year, and we all need to do our part to protect this spectacular trail. We recommend brushing up on Leave No Trace guidelines before you head out on the trail.

Become a Member of the Green Mountain Club
The Green Mountain Club (GMC) protects and maintains the LT and the amenities along the path (shelters, privies, campsites, etc.). Without the hard work of their staff and volunteers, there would be no trail. We encourage you to become a donating member of this amazing organization to help ensure the LT stays around for future generations to enjoy. Plus, you’ll get benefits like staying at the fee-shelters for free. The GMC also commemorates successful end-to-end hikes with a patch and a certificate – be sure to keep a journal about your time on trail to submit with your certification application.
The Green Mountain Club maintains the trail, shelters, campsites, and privies on the Long Trail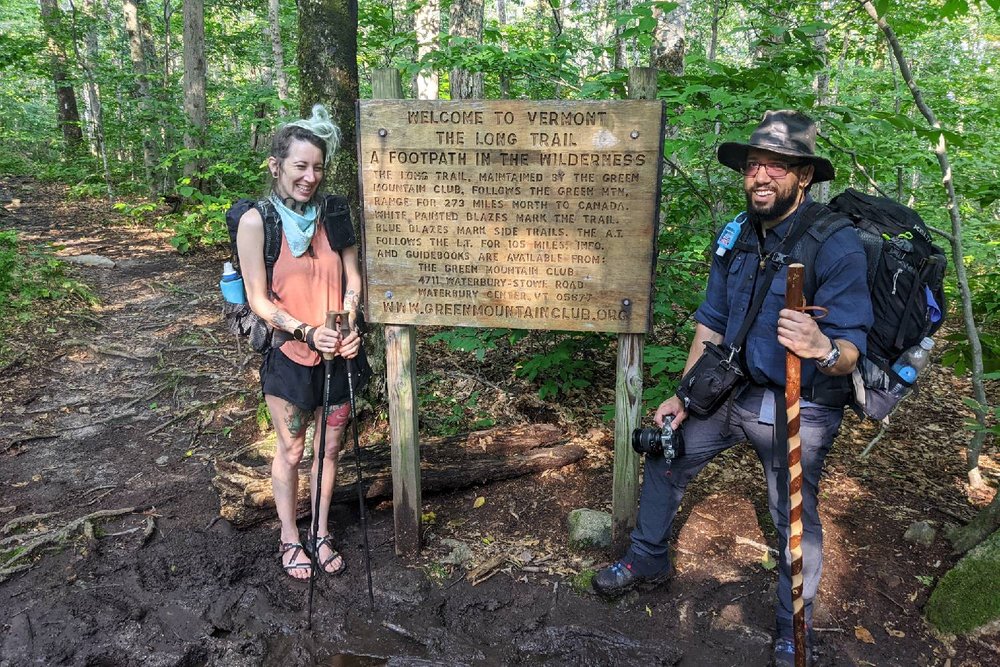
Backpacking Gear
The Long Trail is incredibly beautiful, but also incredibly challenging. For this reason, it’s a good idea to keep your backpacking weight to a minimum.
Dialing in your gear can be expensive and feel overwhelming. But we promise that taking the time to plan and improve your gear setup will make your trek a far more enjoyable and successful experience. Below is the list of what we carried and some other items we recommend.
TENT: We used the Six Moon Designs Lunar Solo on this trip. We love this tent for its low weight and spacious interior – check out our full review here. If you’ll be hiking with a partner, we recommend the Zpacks Duplex or Triplex (if you prefer more room). These tents are spacious, super light, and the Dyneema material is a good choice for trails as wet as the LT because it won’t absorb water or sag when wet. The Lunar Solo, Duplex, and Triplex are all on our list of the Best Ultralight Tents.
The Six Moon Designs Lunar Solo is one of our favorite single-person tents on our Best Ultralight Tents list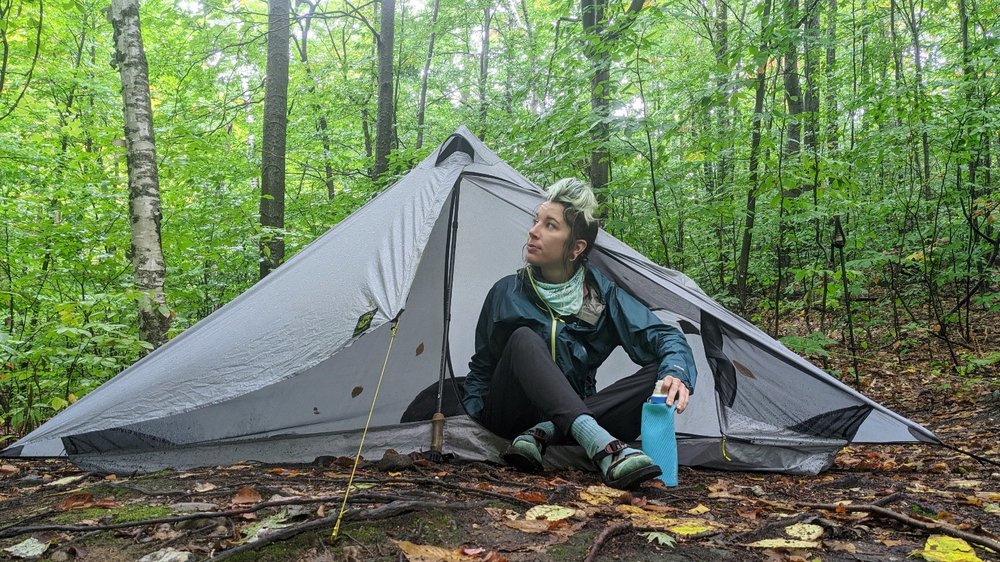
BACKPACK: We used the Hyperlite Mountain Gear Southwest 2400, and we loved this choice because it’s lightweight and about as close to fully waterproof as backpacks get. Check out our list of the Best Backpacking Packs for our other top backpack recommendations.
A waterproof Hyperlite Mountain Gear Southwest 2400 is a great choice for the soggy Long Trail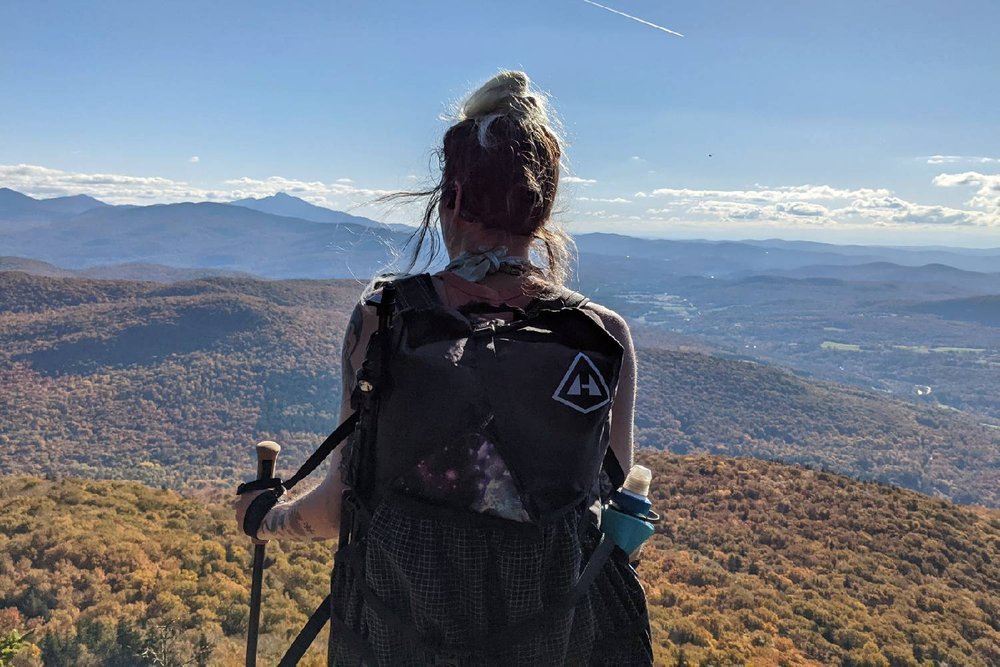
SLEEPING BAG: We took the Loco Libre Ghost Pepper 20 quilt on this trip, and we found it to be a little too warm on many nights (we hiked from mid-September to early October). That said, we did have a few particularly chilly nights during which we were glad for the extra insulation. If you’re a warm sleeper and you want to go a little lighter, a 30 degree sleeping bag or quilt from our lists of the Best Backpacking Sleeping Bags and Best Backpacking Quilts would probably suffice.
The Loco Libre Ghost Pepper 20 is one of the warmest quilts on our Best Backpacking Quilts list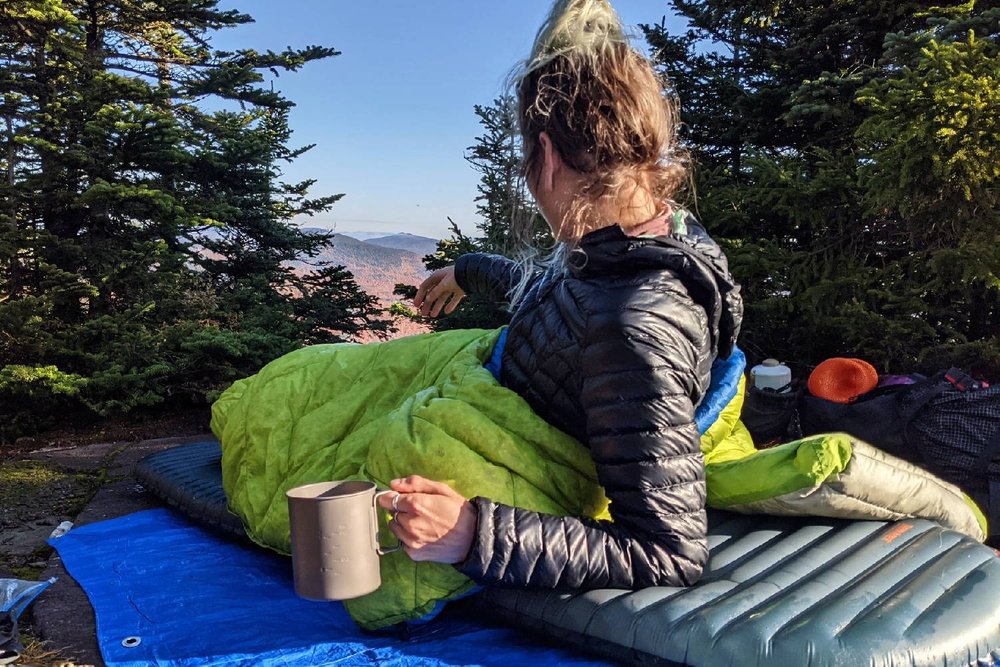
SLEEPING PAD: We packed the Therm-a-Rest Uberlite because it’s ultralight, compact, and comfortable. Many hikers use a closed-cell foam pad, like the NEMO Switchback, because R-value isn’t quite as important when you’re sleeping in shelters, and they’re durable on wood platforms. That said, an inflatable pad is a lot more comfortable, especially if you’re a side sleeper. If you do plan to sleep in shelters, remember to bring a groundsheet to provide a barrier between your pad and the drafty, dirty shelter floors. For more of our favorite options, head over to our list of the Best Backpacking Sleeping Pads.
Many Long Trail hikers carry a simple closed-cell foam pad, like the NEMO Switchback, for sleeping in shelters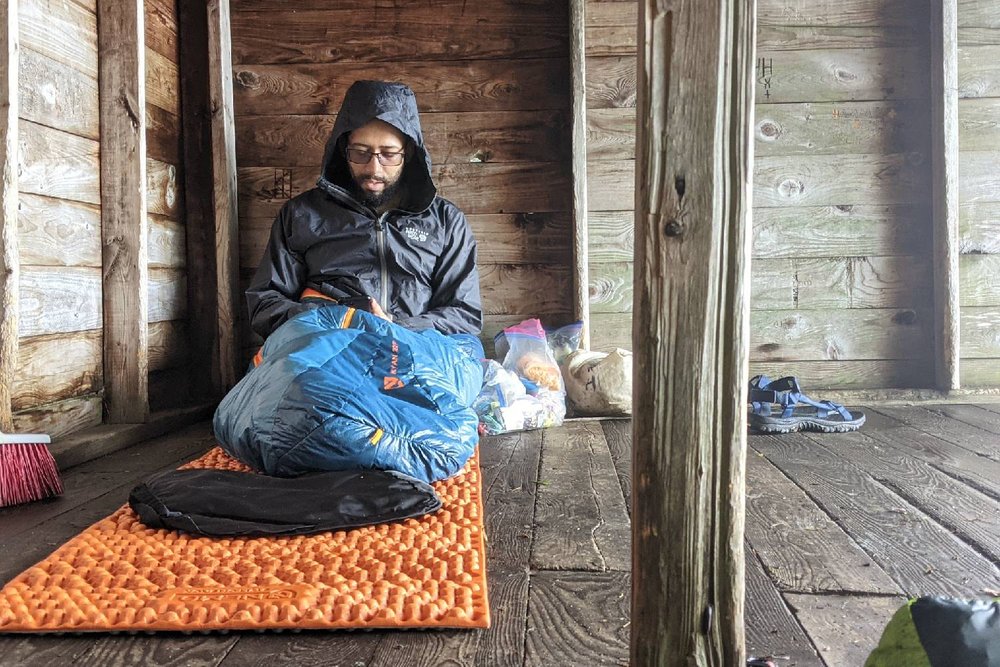
COOKING SYSTEM: We took the Snow Peak Litemax, TOAKS Titanium 750 mL Pot, and Sea to Summit Alpha Light Long Spoon. These items made for an awesome ultralight cook system, and they can all be found on our Best Backpacking Stoves and Best Backpacking Cookware lists.
The Snow Peak Litemax and TOAKS Titanium 750 mL Pot make for an ultralight cook system
WATER FILTER: We used the Katadyn BeFree paired with a Hydrapak Flux water bottle for this trip, because it’s lightweight and easy to use. These items rank highly on our Best Backpacking Water Filters and Best Water Bottles lists.
The Katadyn BeFree water filter paired with a Hydrapak Flux water bottle is our go-to for ultralight backpacking
FOOTWEAR: We wore Chaco Z/1 Classic Sandals (men’s / women’s) for this hike. Controversial, we know, but we liked that we were able to tromp straight through all the mud. Rainy days were also slightly less uncomfortable because we didn’t have to worry about wet socks or shoes. If you prefer closed-toe shoes, we recommend the Saucony Peregrines (men’s / women’s) for their excellent traction – which will come in handy on all the slick rock you’ll encounter on the LT. The Z/1 Classic sandals are our top pick on our Best Hiking Sandals (men / women) list, and the Peregrines are our top non-waterproof hiking shoe pick on our Best Hiking Shoes (men / women) list.
Chaco Z/1 Classic Sandals (men’s / women’s) are our favorite hiking sandals for their comfort and durability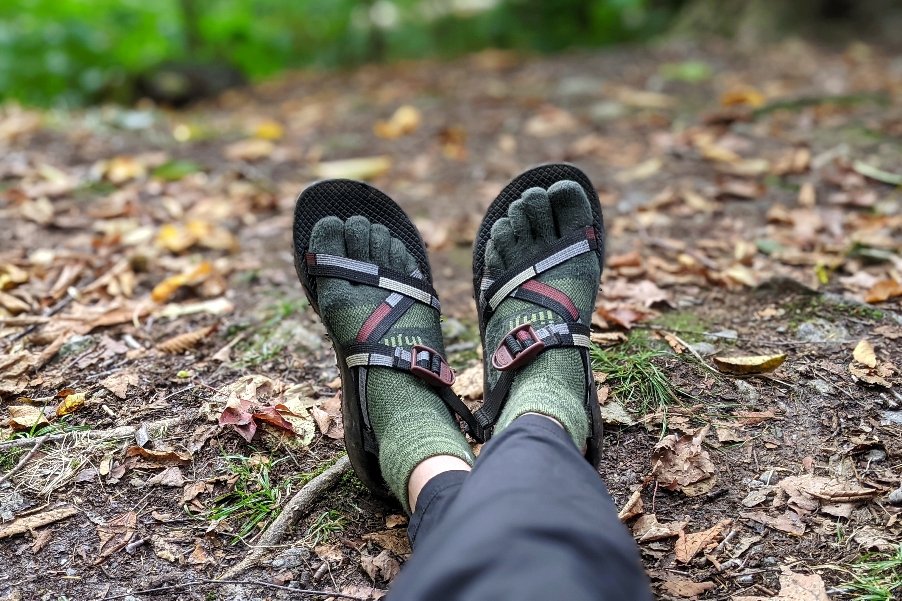
GAITERS: We don’t recommend waterproof footwear for this trail, since it stays pretty consistently wet out there. Once wet, it will be very hard to get waterproof footwear to dry. We do recommend using waterproof gaiters, though, to give your feet the best chance at staying dry.
waterproof gaiters will help keep your feet dry on the muddy Long Trail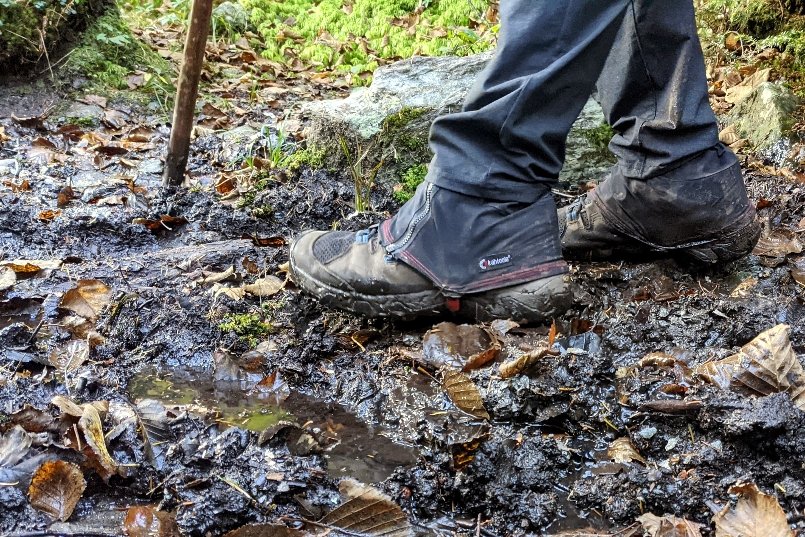
HEADLAMP: We took the Black Diamond Spot 350 from our list of the Best Headlamps. We love that it’s bright, lockable, and has a long burn time.
The super bright Black Diamond Spot 350 is perfect for night hiking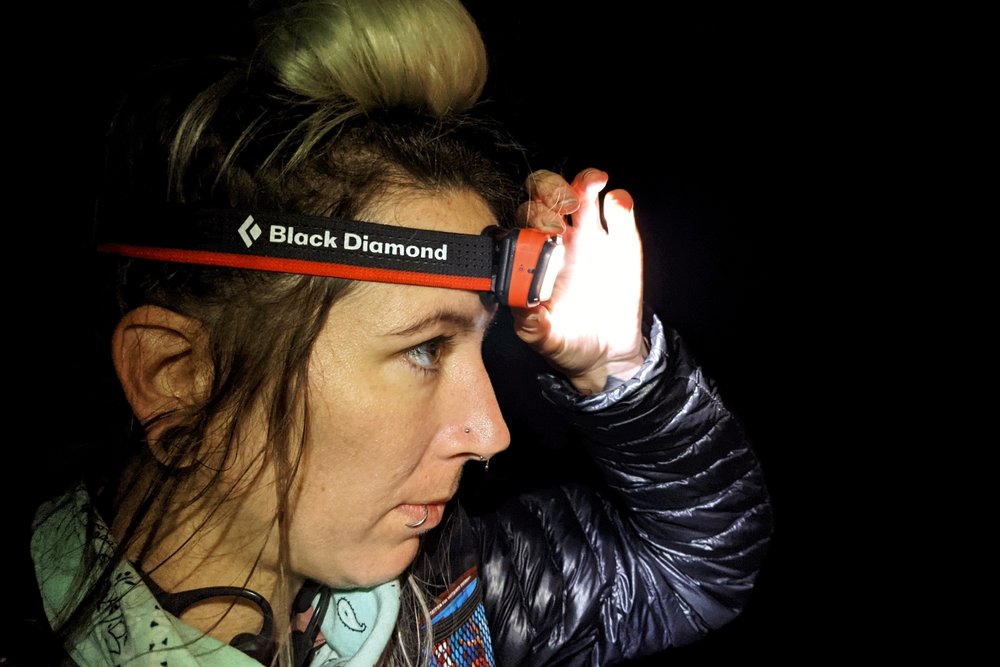
FOOD: Check out our Best Lightweight Backpacking Food Guide, Best Freeze Dried Backpacking Meals list, Best Energy Bars list, and other Food Guides for some of our go-to recommendations.
Clif Bars are affordable and keep your energy up on trail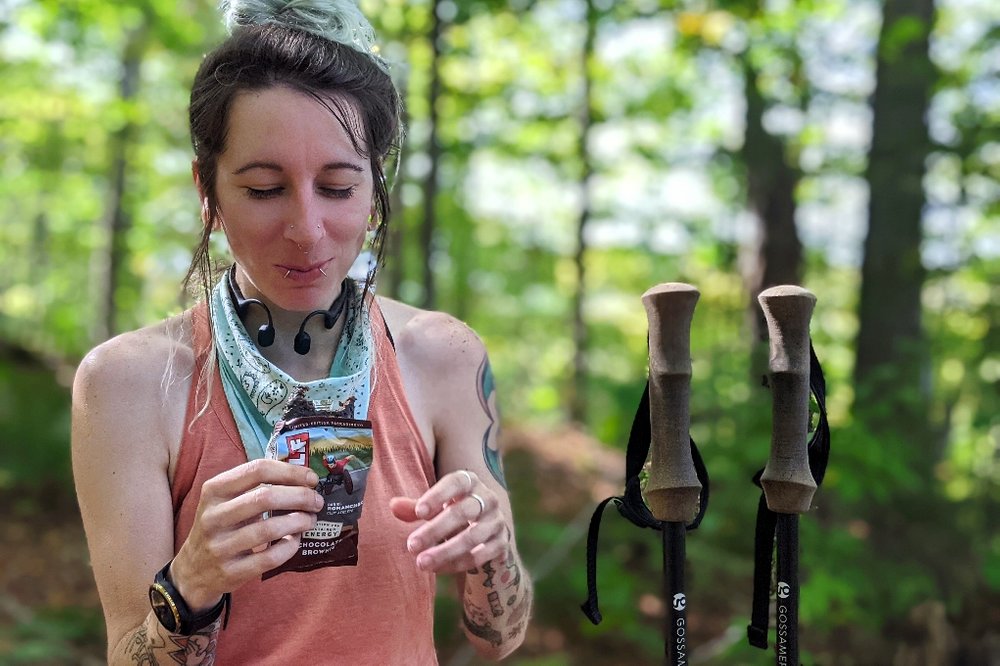
FOOD STORAGE: We stored our food in an Ursack Major to protect it from bears, rodents, and other small critters.
CLOTHING: Below is the list of clothing we carried. But since your clothing choices will depend upon what makes you feel most comfortable, we recommend heading over to our Backpacking & Hiking Clothing 101 post and our best clothing lists on our Gear Guide to put together your ideal layering system.
-
Down jacket – Mountain Hardwear Ghost Whisperer (men’s / women’s)
-
Hiking pants – Mountain Hardwear Dynama Ankle
-
Hiking shorts – Nike Dri Fit Running Shorts (men’s / women’s)
-
Hiking shirt – Patagonia Capilene Cool Daily Tank Top
-
Long-sleeve base layer shirt – Arc’teryx Rho LT (men’s / women’s)
-
Base layer bottom – Patagonia Capilene Midweight (men’s / women’s)
-
Underwear – Patagonia Barely Sports Bra & Odlo Performance Light Underwear (men’s / women’s)
-
2-3 Pair socks (add thin sock liners if using boots) – Injinji Run Quarter & Darn Tough Light Hiker (for cold weather)
-
Warm hat
-
Gloves – Arc’teryx Venta
-
Bandana
The weather can change quickly on the long trail, so it’s important to dial in your clothing system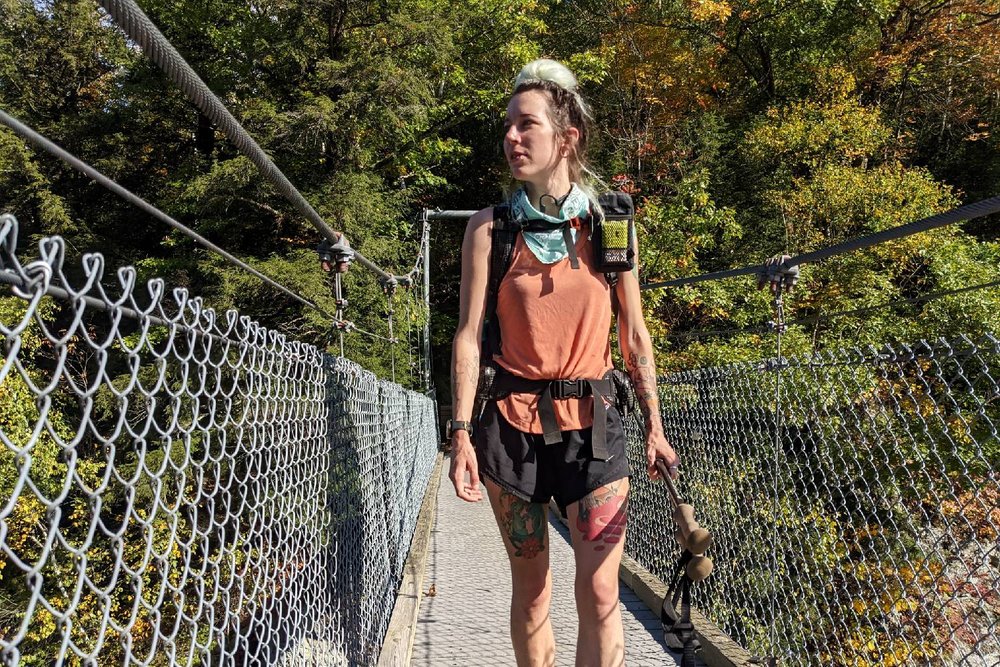
NAVIGATION: We used the Far Out Long Trail Guide app which we loved because it helped us stay up-to-date on current water source conditions and helped us plan our resupplies. Some hikers also choose to use the Long Trail Guidebook published by the Green Mountain Club, which is an awesome option if you want to also learn about the history, flora, and fauna of the trail.
FIRST AID KIT: Always bring a small personalized first aid kit; we used a custom kit that we pieced together using the .3 Ultralight Kit and cut up strips of RockTape.
SUN PROTECTION: Most of this hike is in dense forest, but you’ll be above treeline for some portions as well – especially in the northern half. Sunglasses, sunscreen, and SPF lip balm are all still a good idea.
A good amount of the Long Trail is in tree cover, so we skipped sun protection for this trip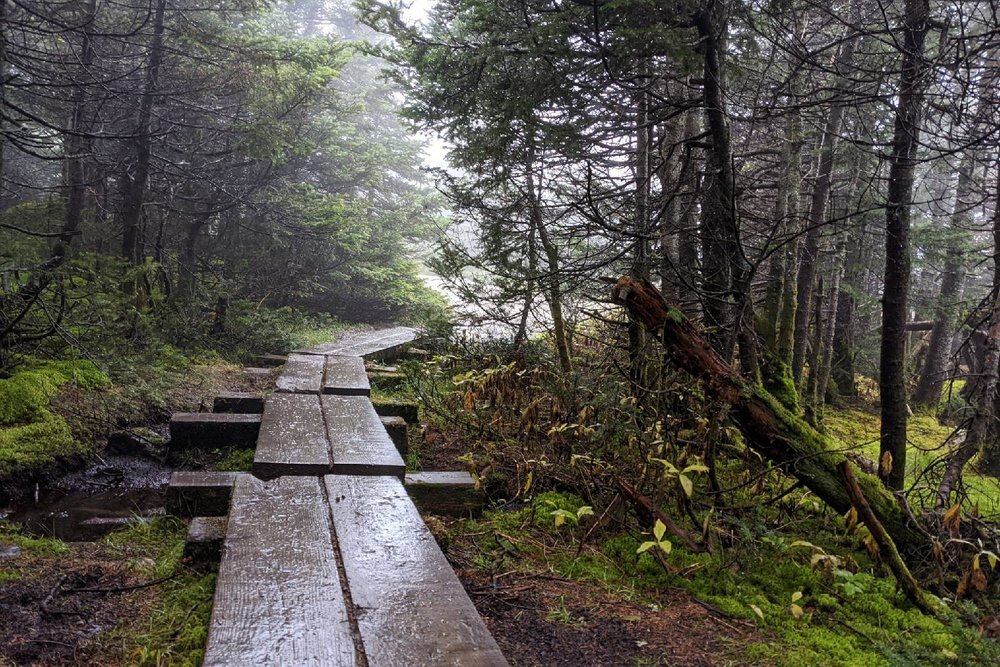
POCKET KNIFE: We only brought a small pair of ultralight scissors with us because our travel plans included a flight. If you don’t have to worry about airline travel, we recommend the Benchmade Mini Bugout from our Best Pocket Knives list or the Swiss Army Classic from our Best Multitools list because they’re lightweight and compact.
OTHER ITEMS:
-
Packtowl (we use the face size)
-
Cash and ID
-
Personal toiletries
-
Hand sanitizer
-
Insect repellant (if going in the buggy months)
-
Camera
For more recommendations on our favorite lightweight backpacking equipment, check out the CleverHiker Gear Guide and our Top Picks page.
More Information
We hope this guide helps you plan your unforgettable journey on the Long Trail. As always, leave a comment below if you have any recommendations, questions, or suggestions. For more popular CleverHiker content, check out the following links:
Some of the links on this page are affiliate links, which means we may receive a modest commission if purchases are made through those links. This adds no cost to our readers and helps us keep our site up and running. Our reputation is our most important asset, which is why we only provide completely honest and unbiased recommendations.


