
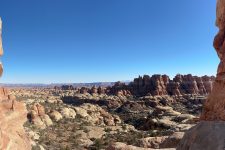
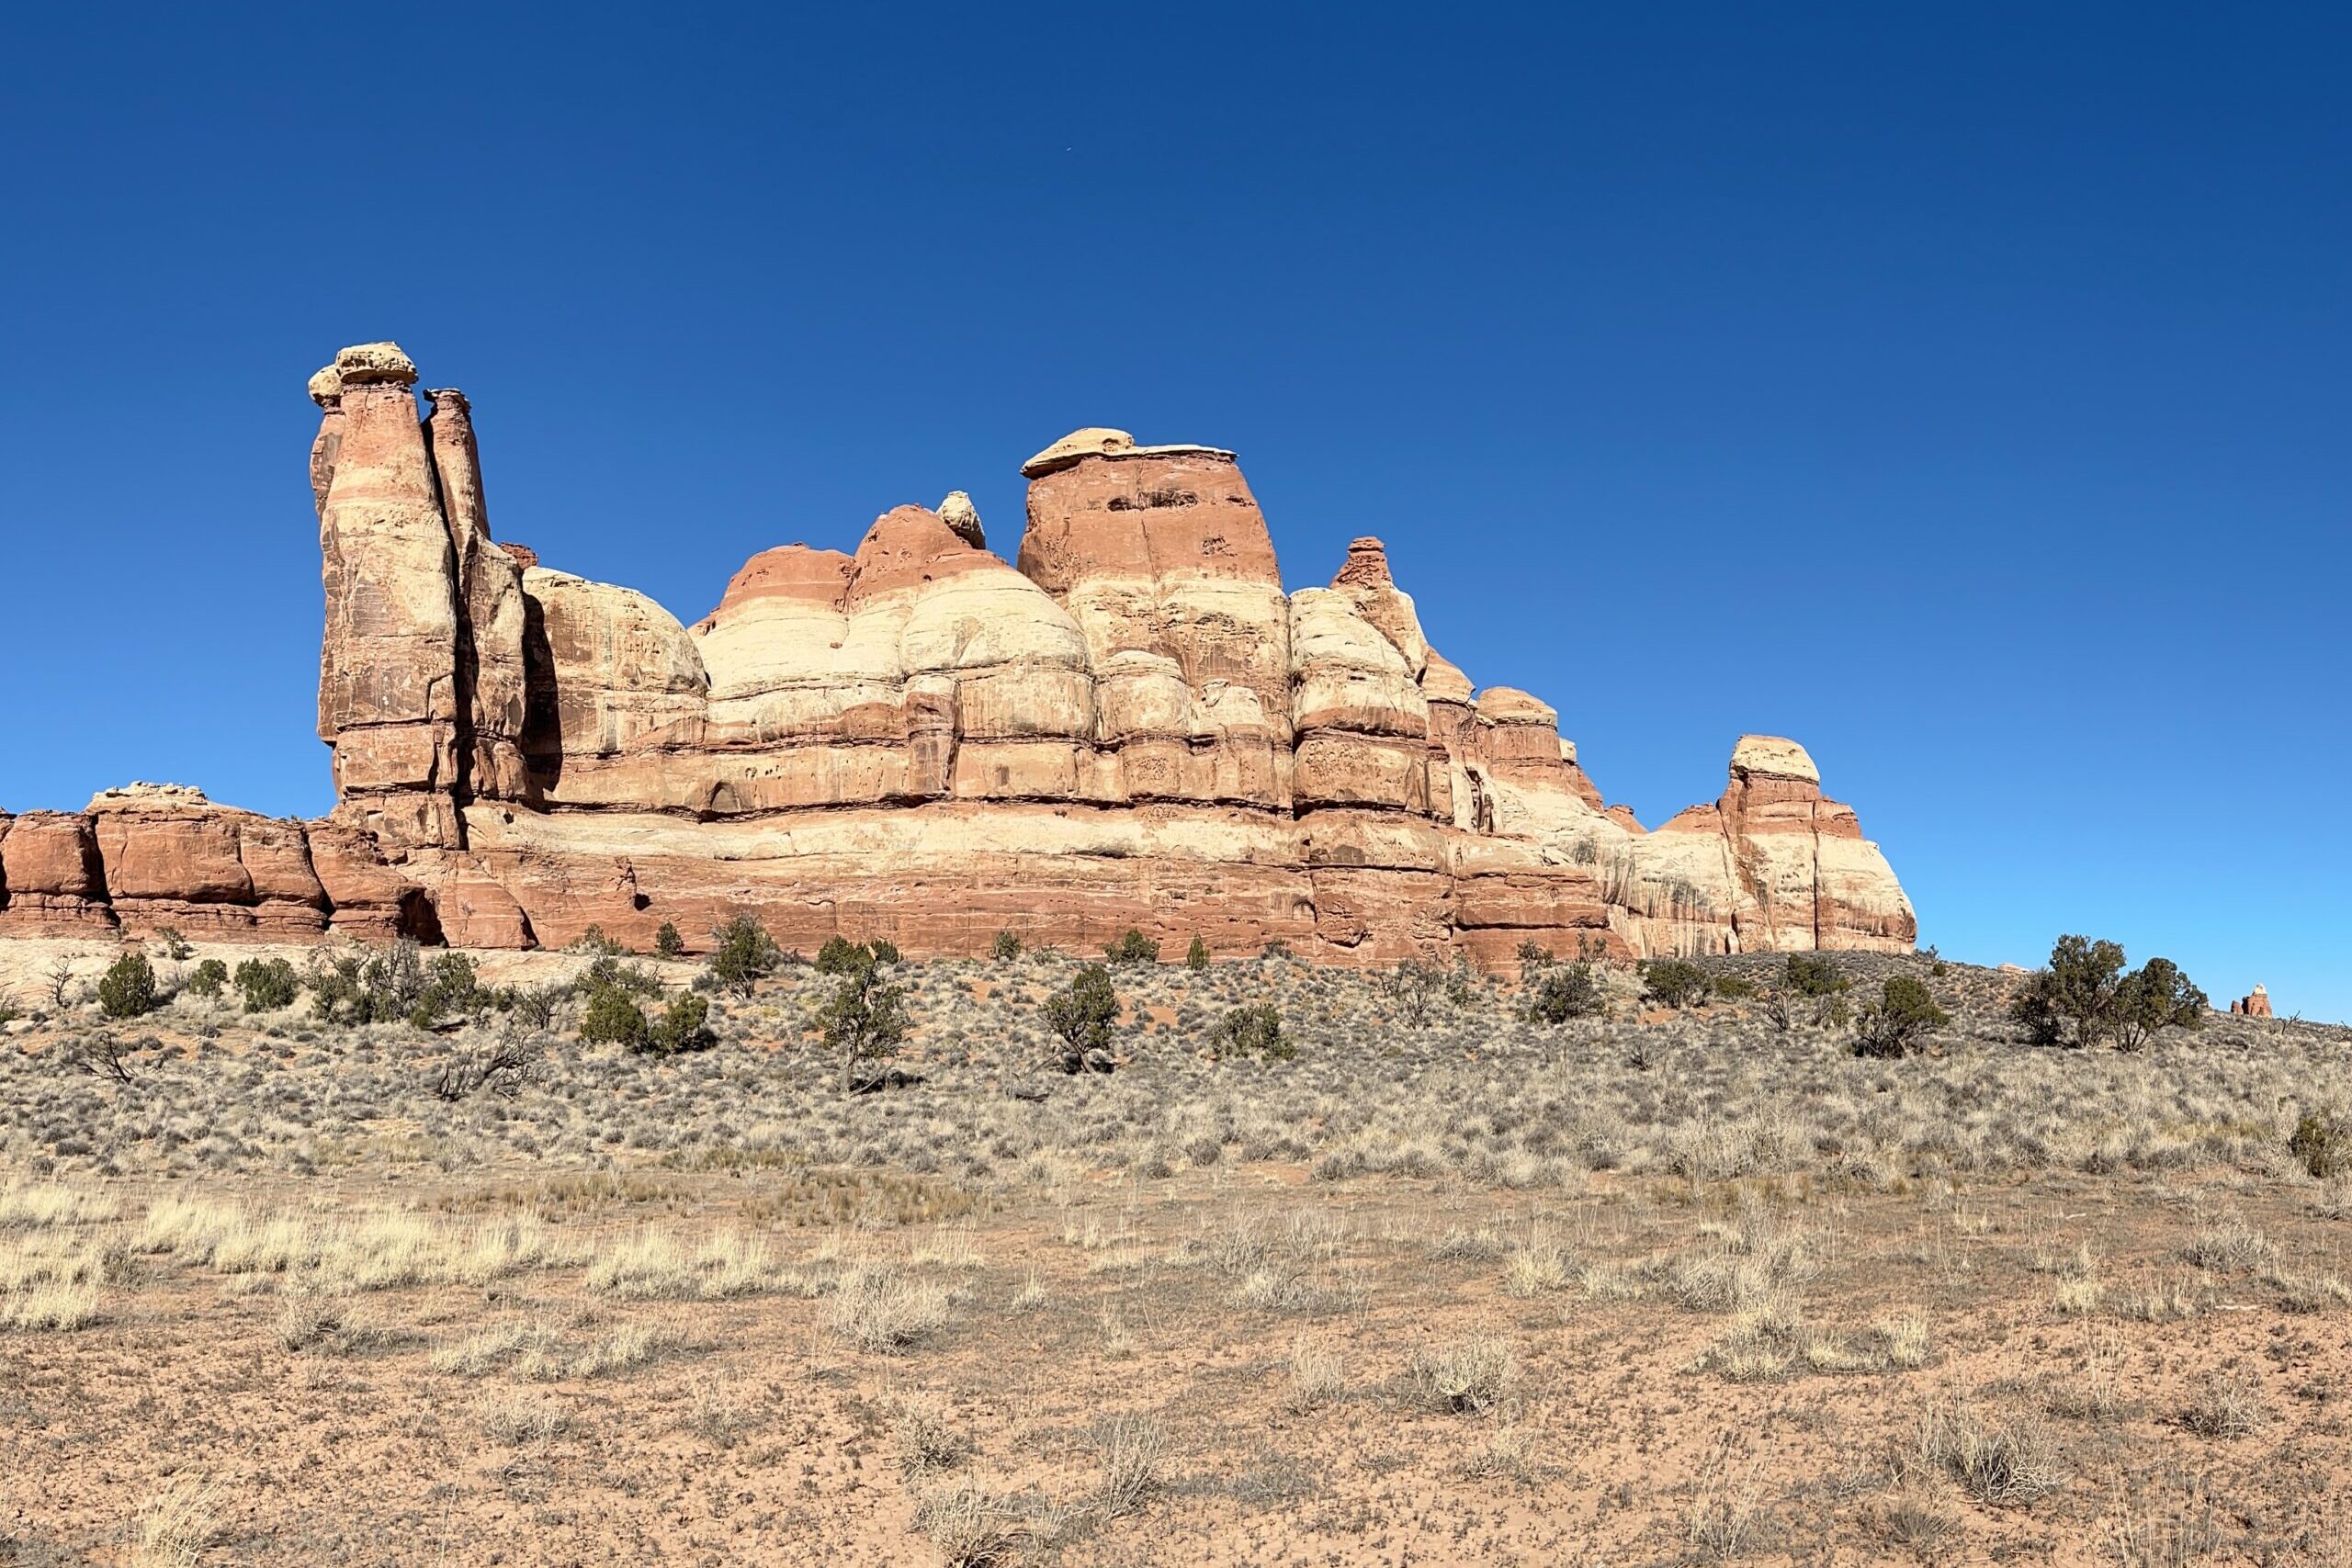
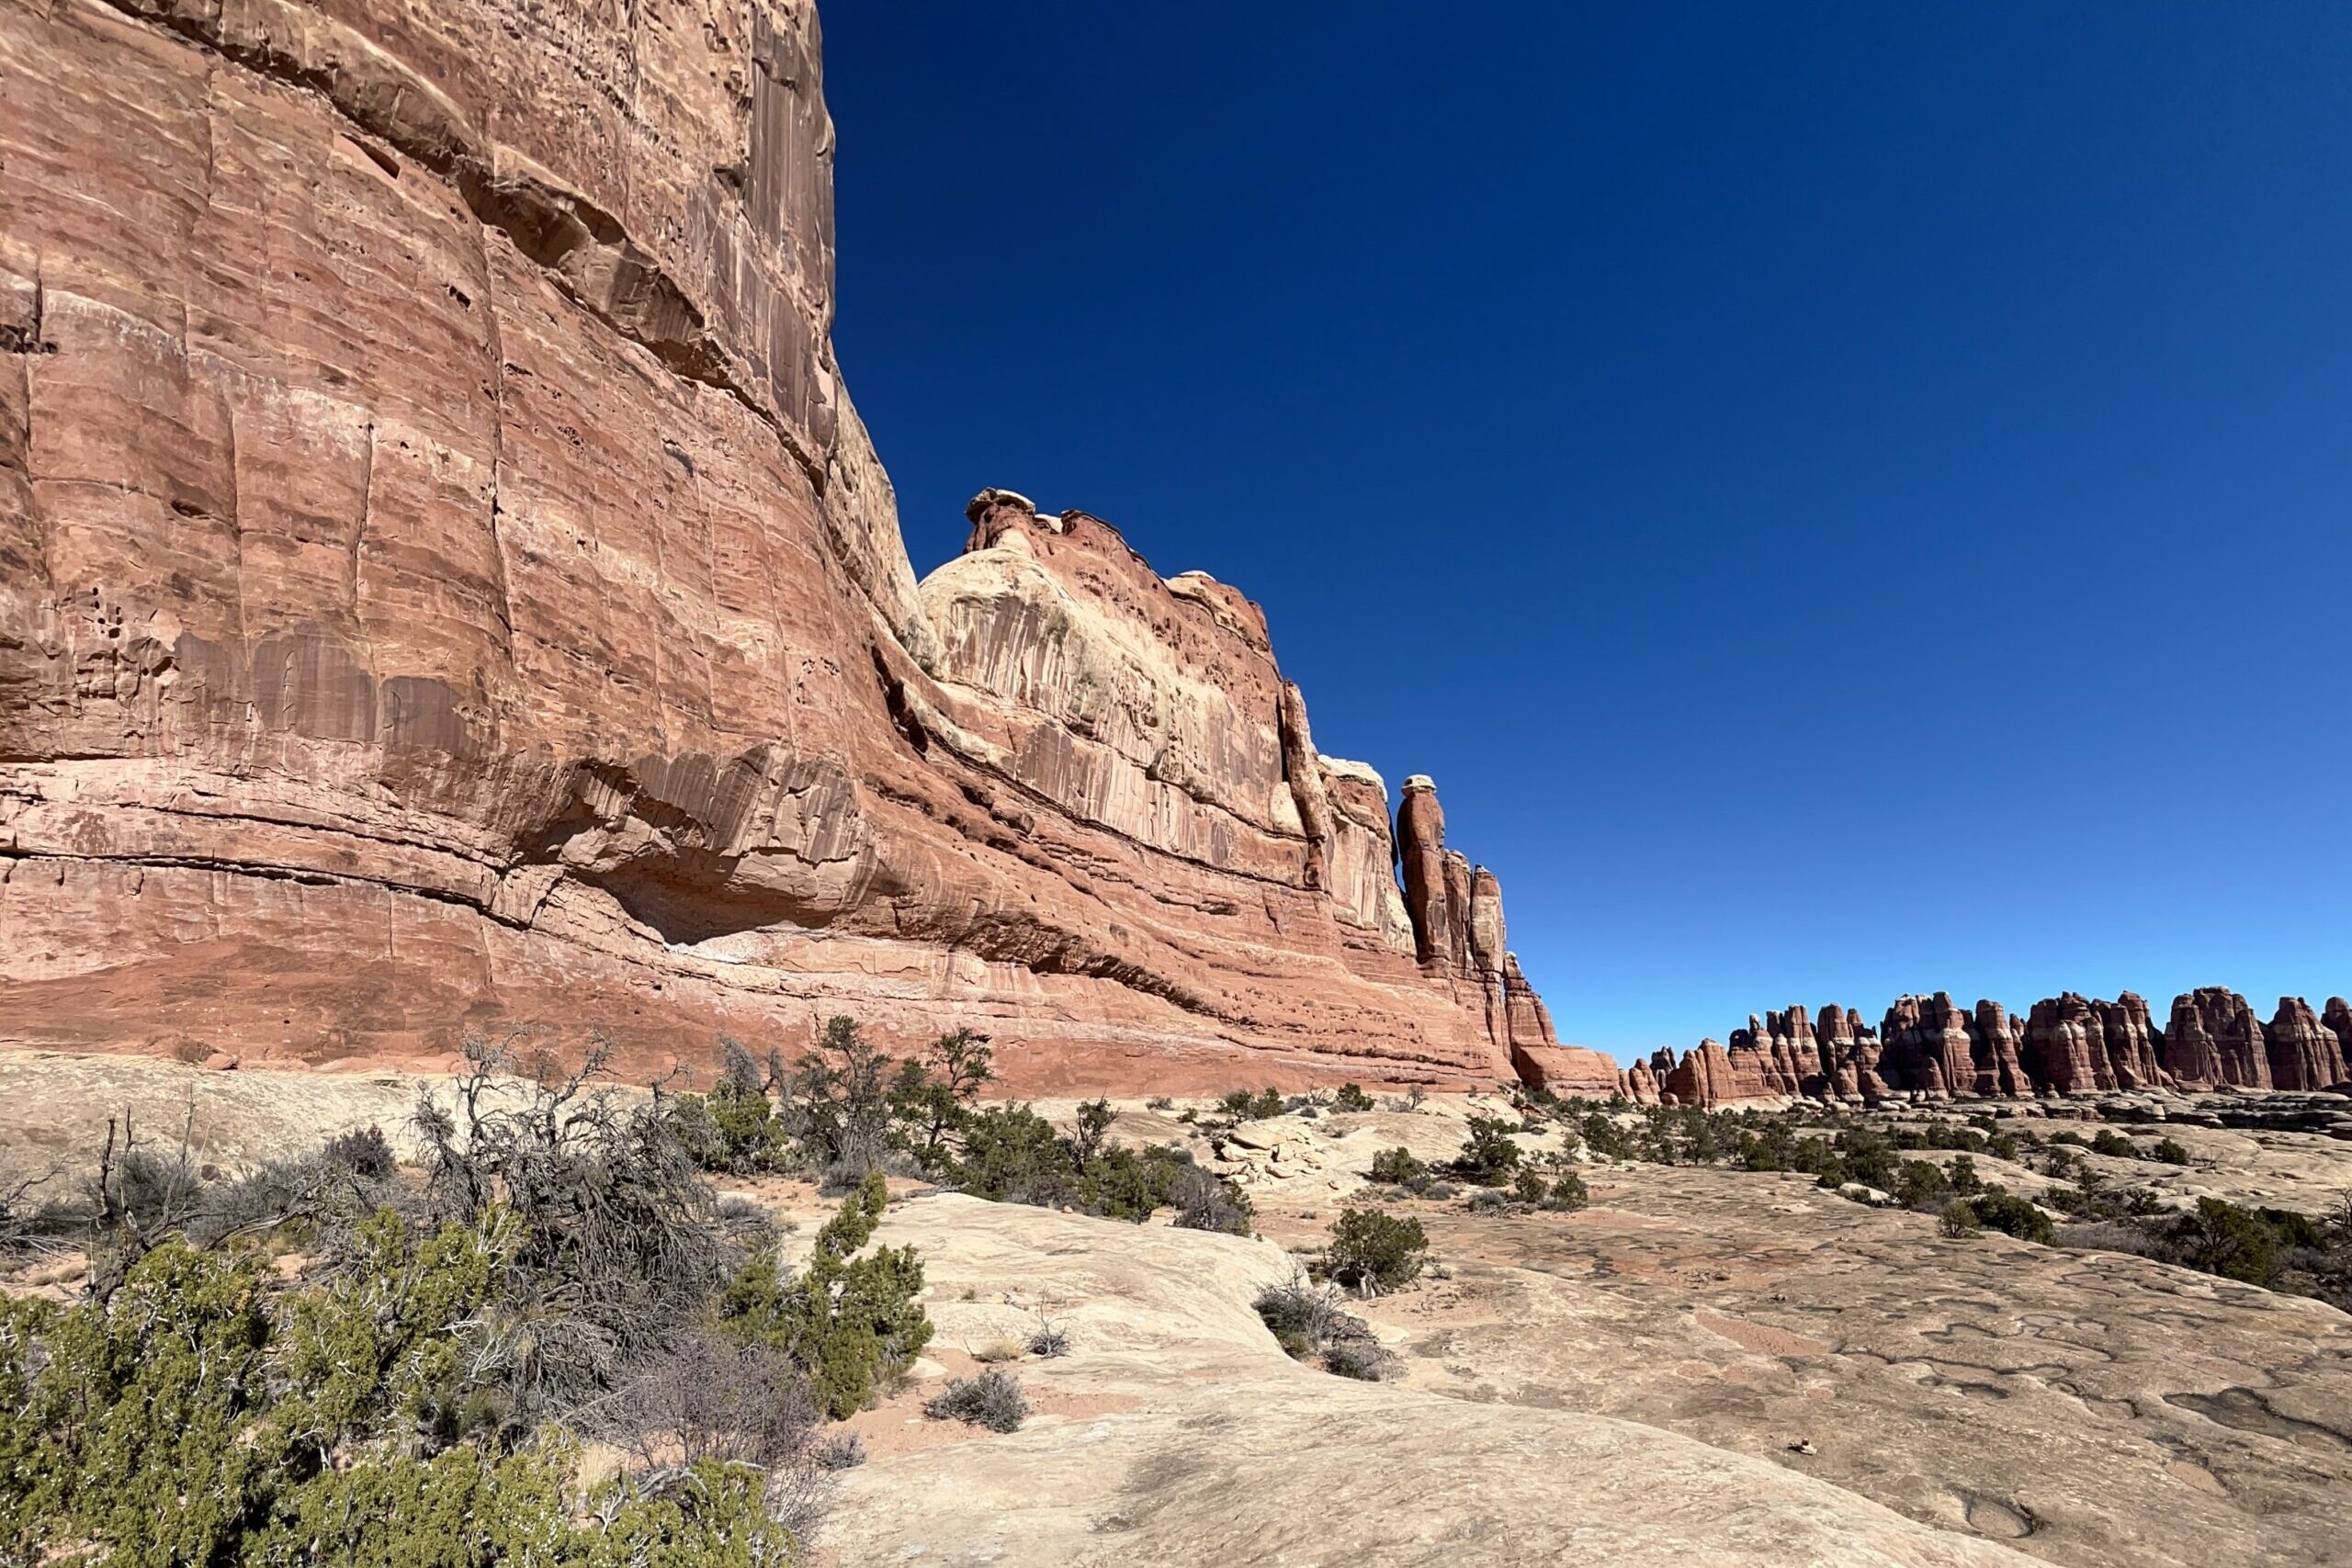
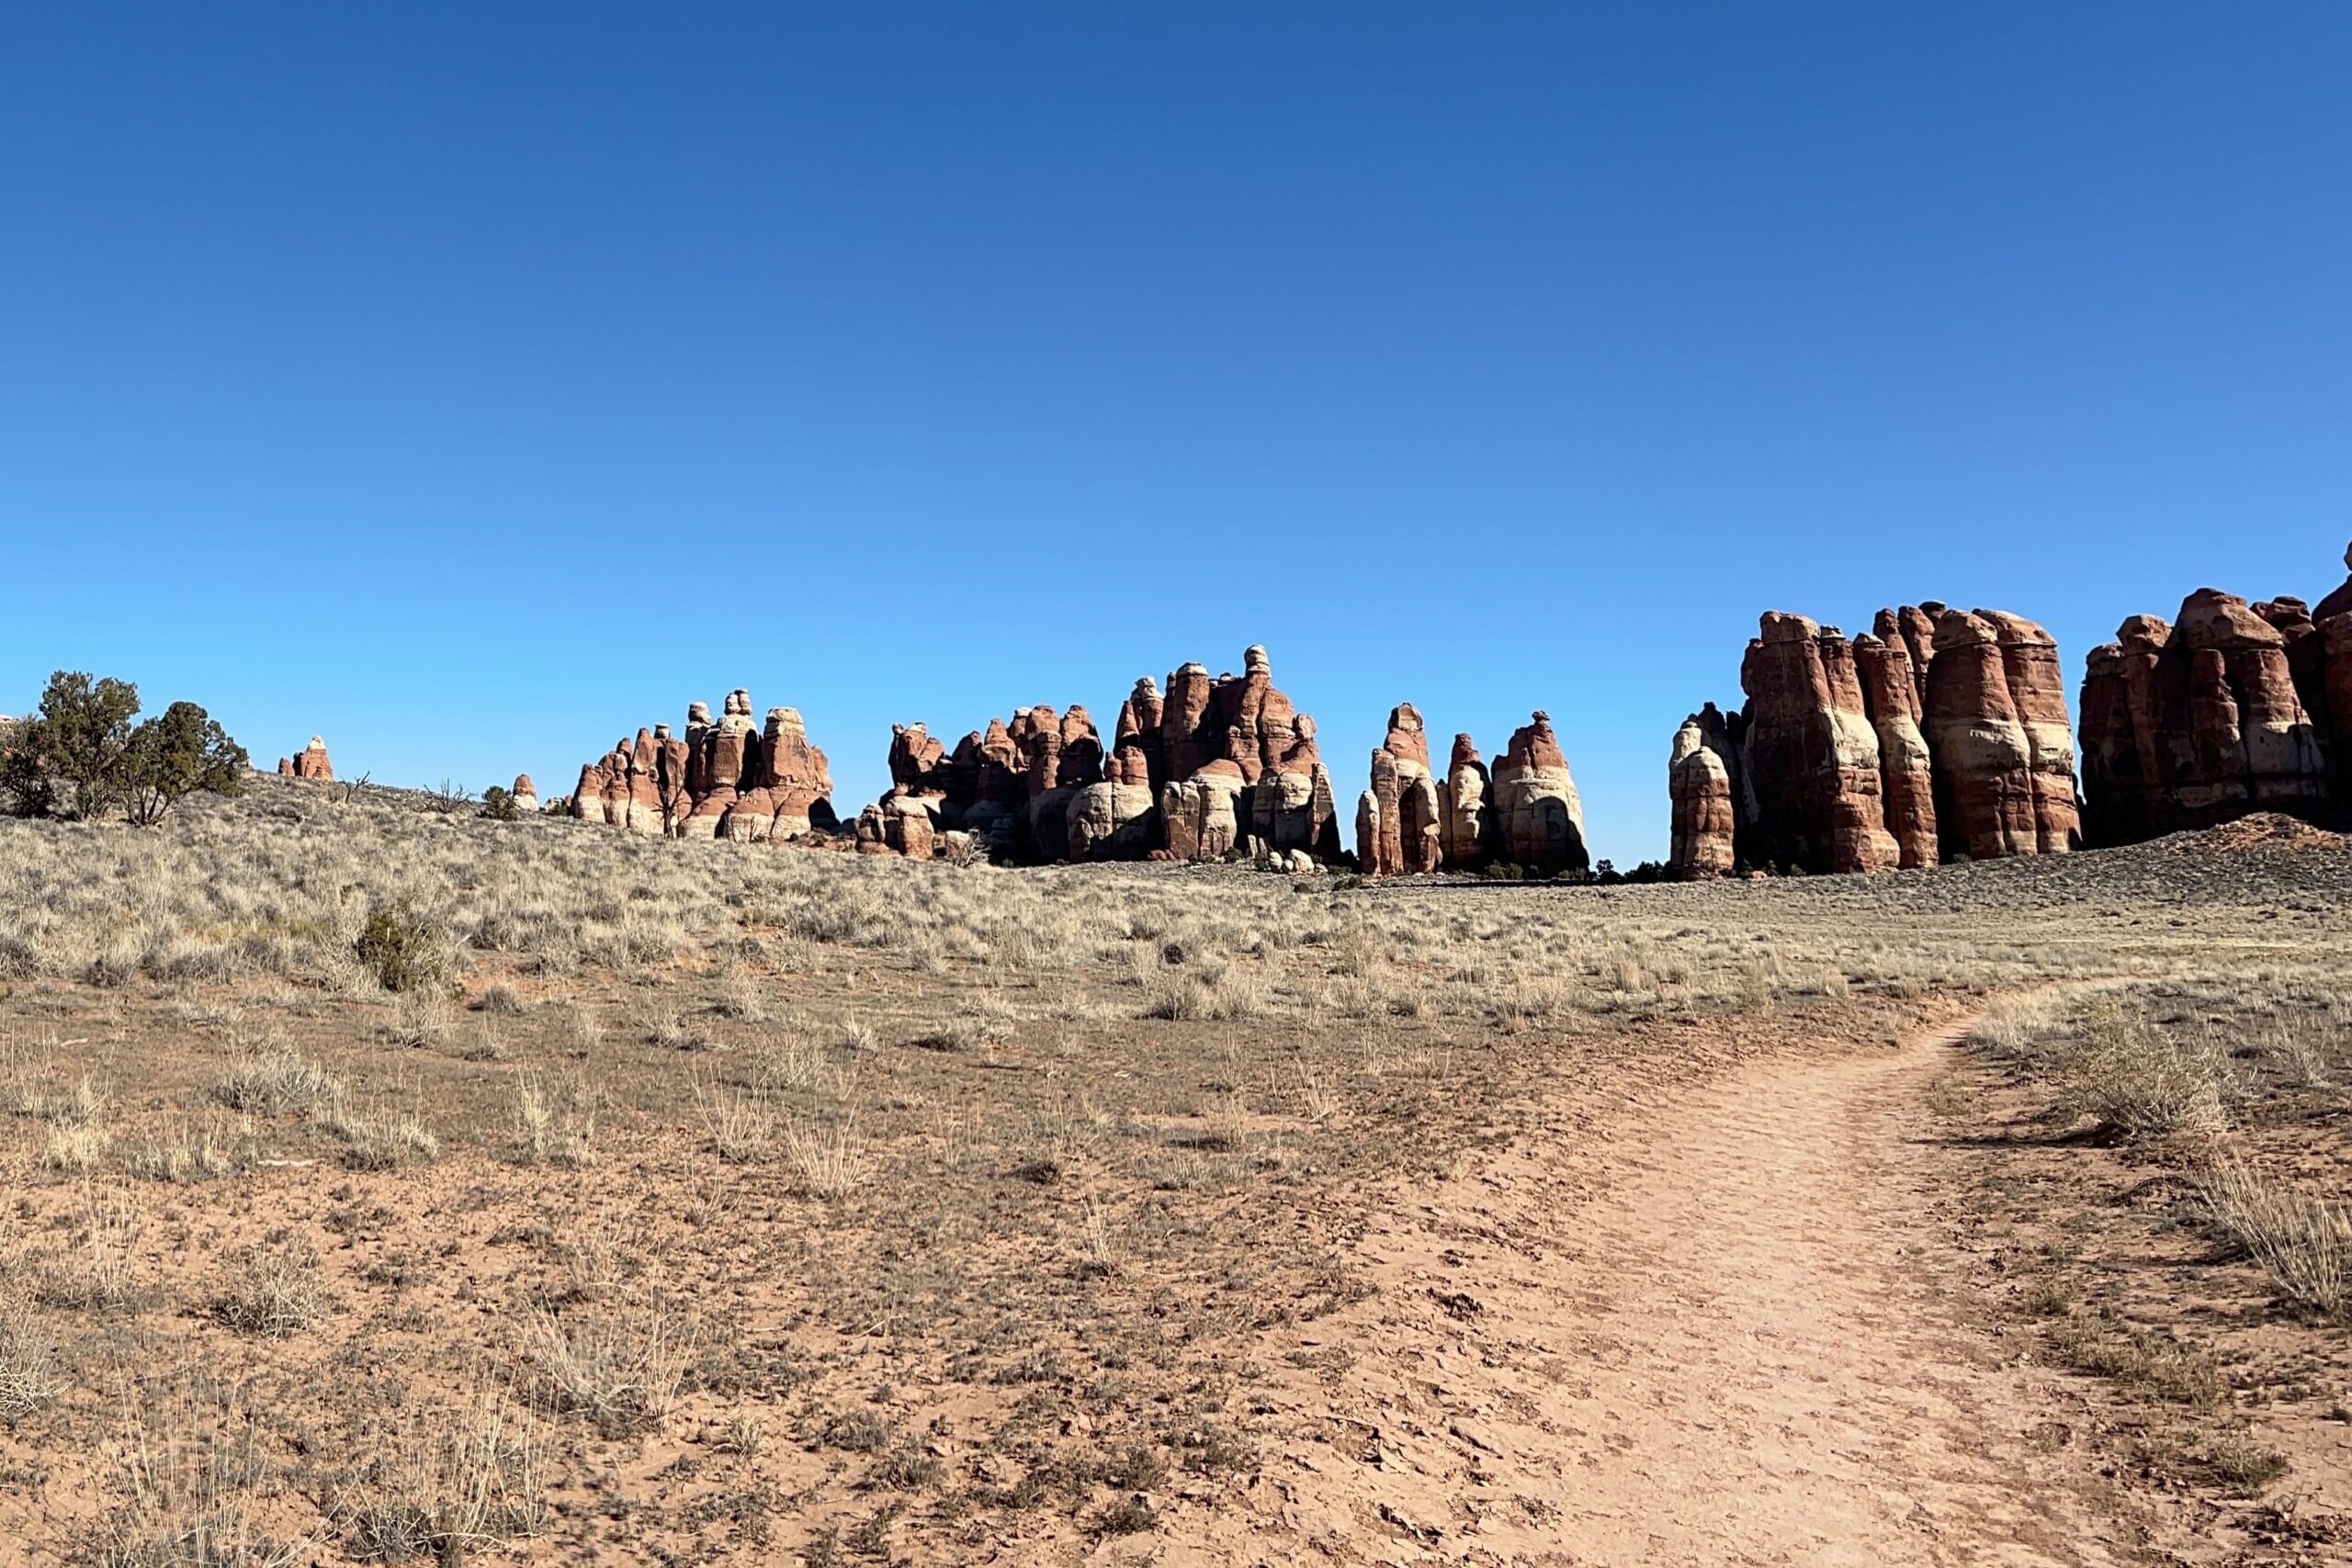
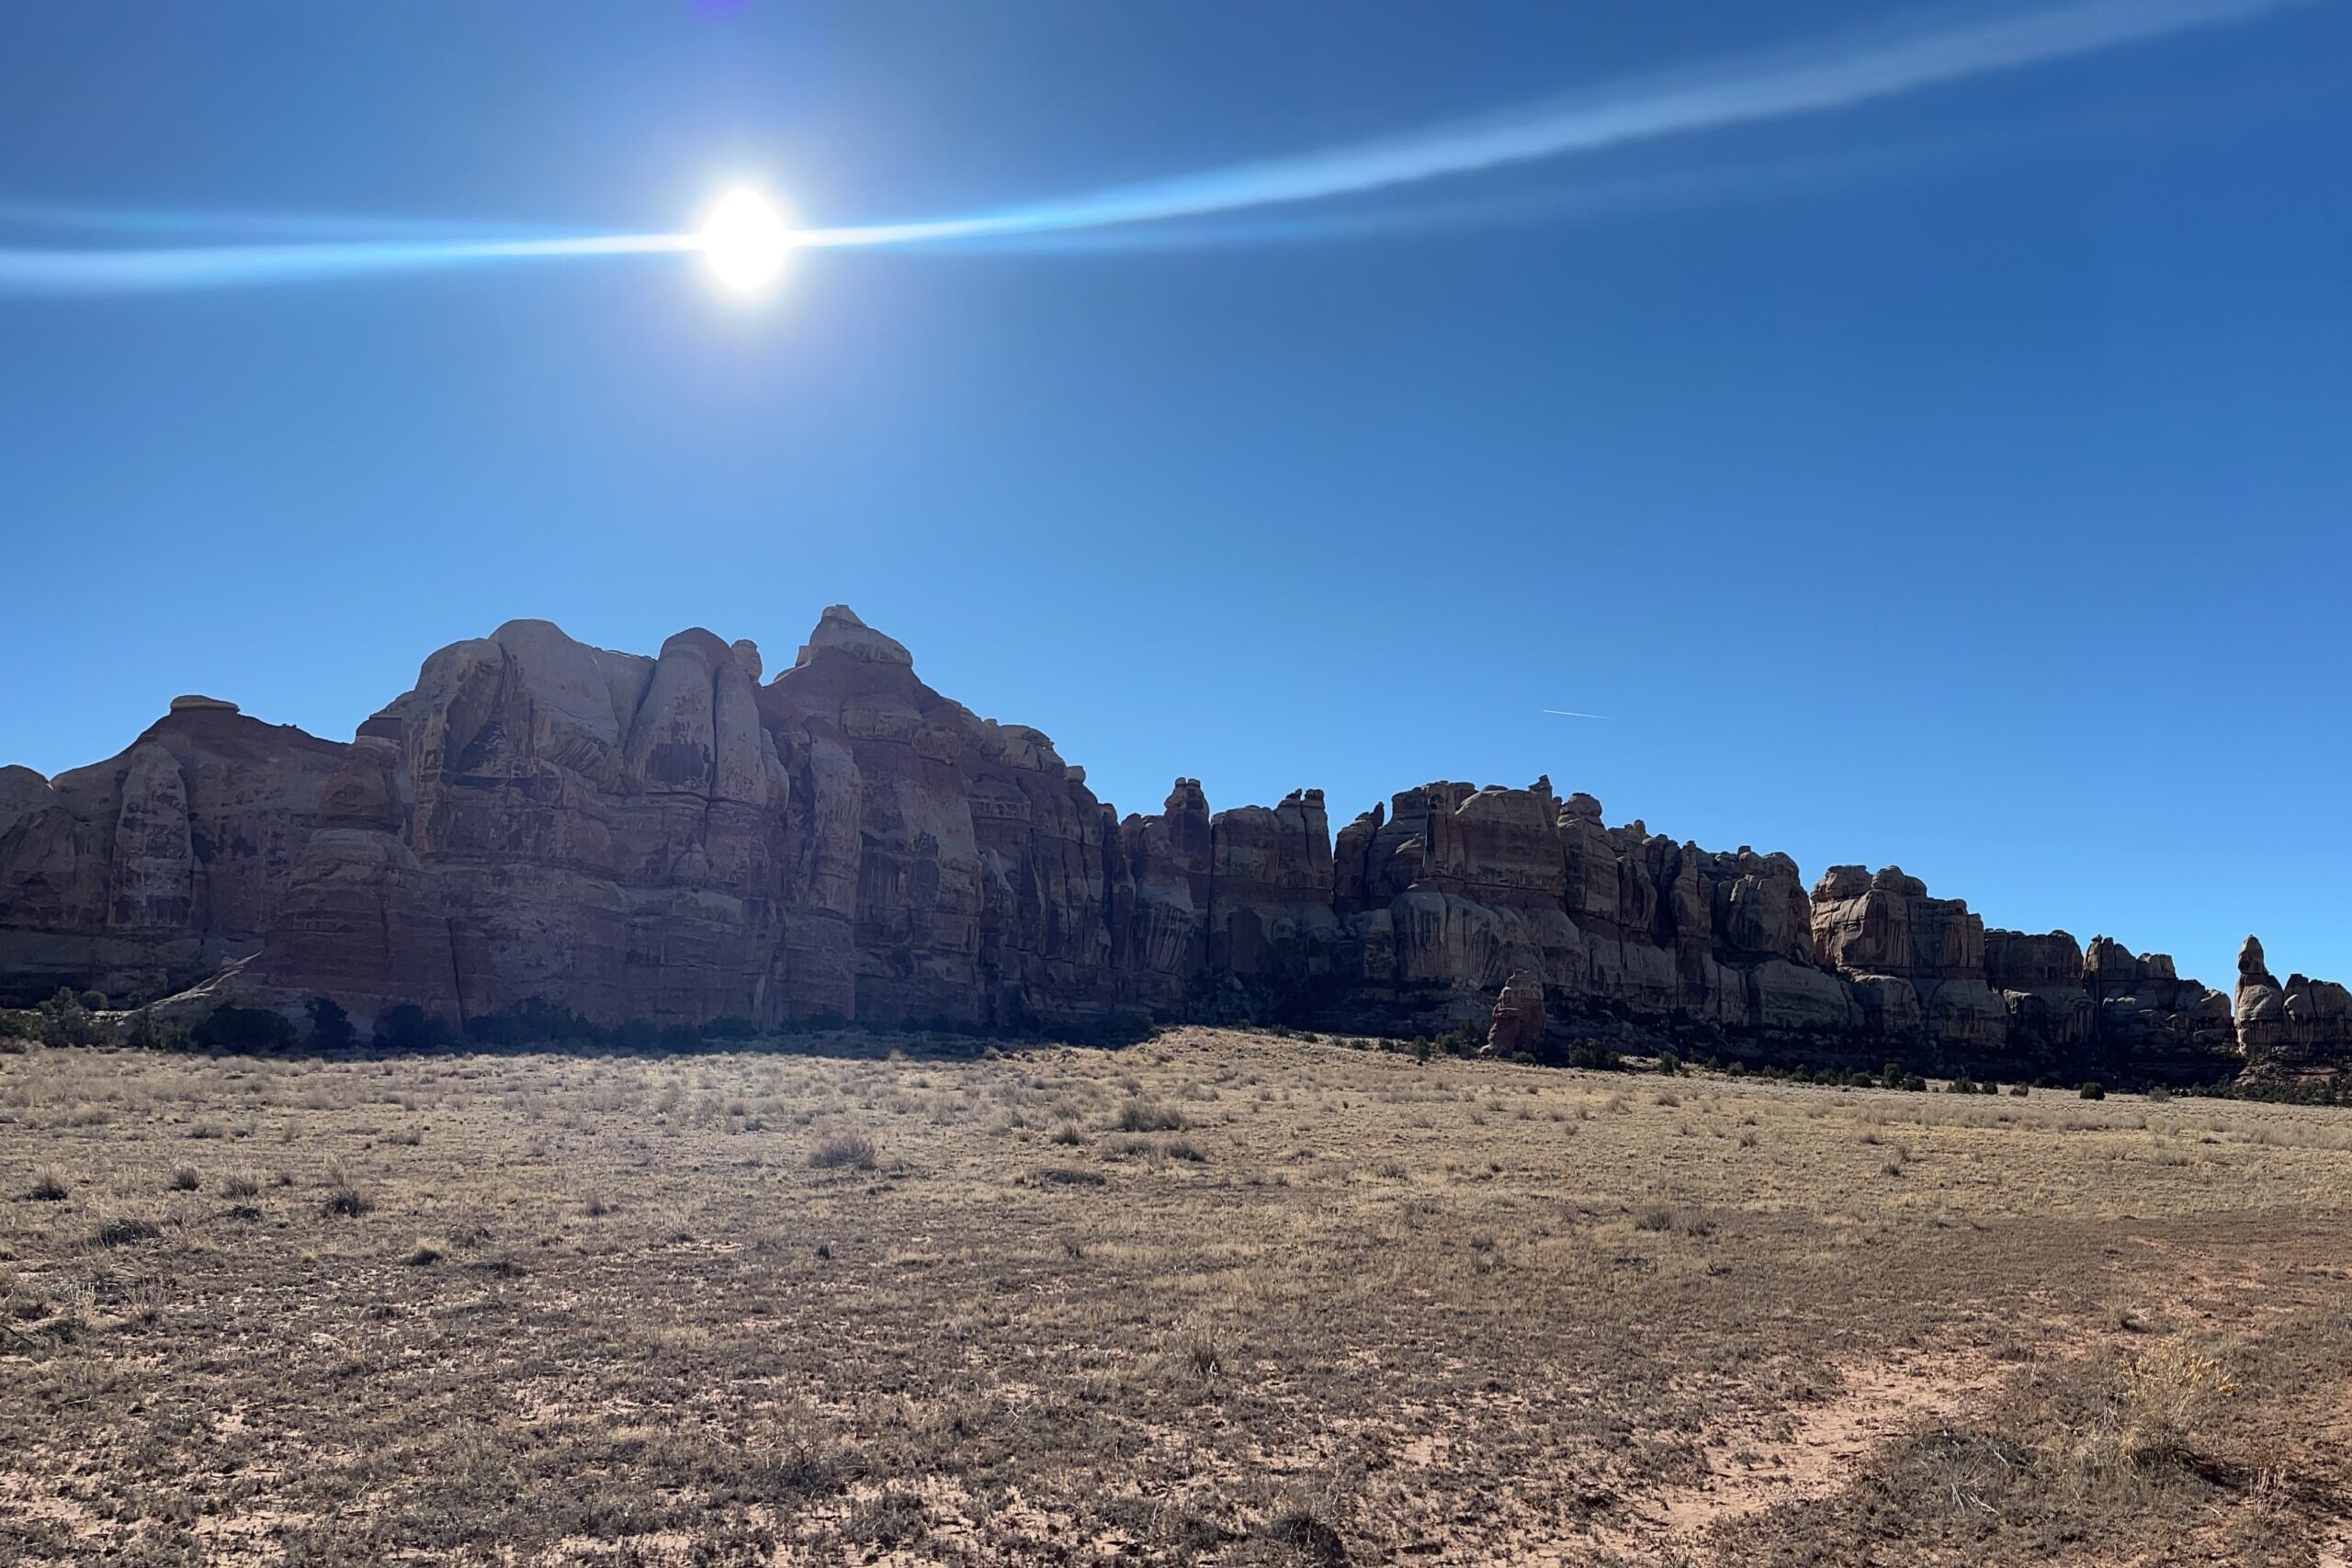
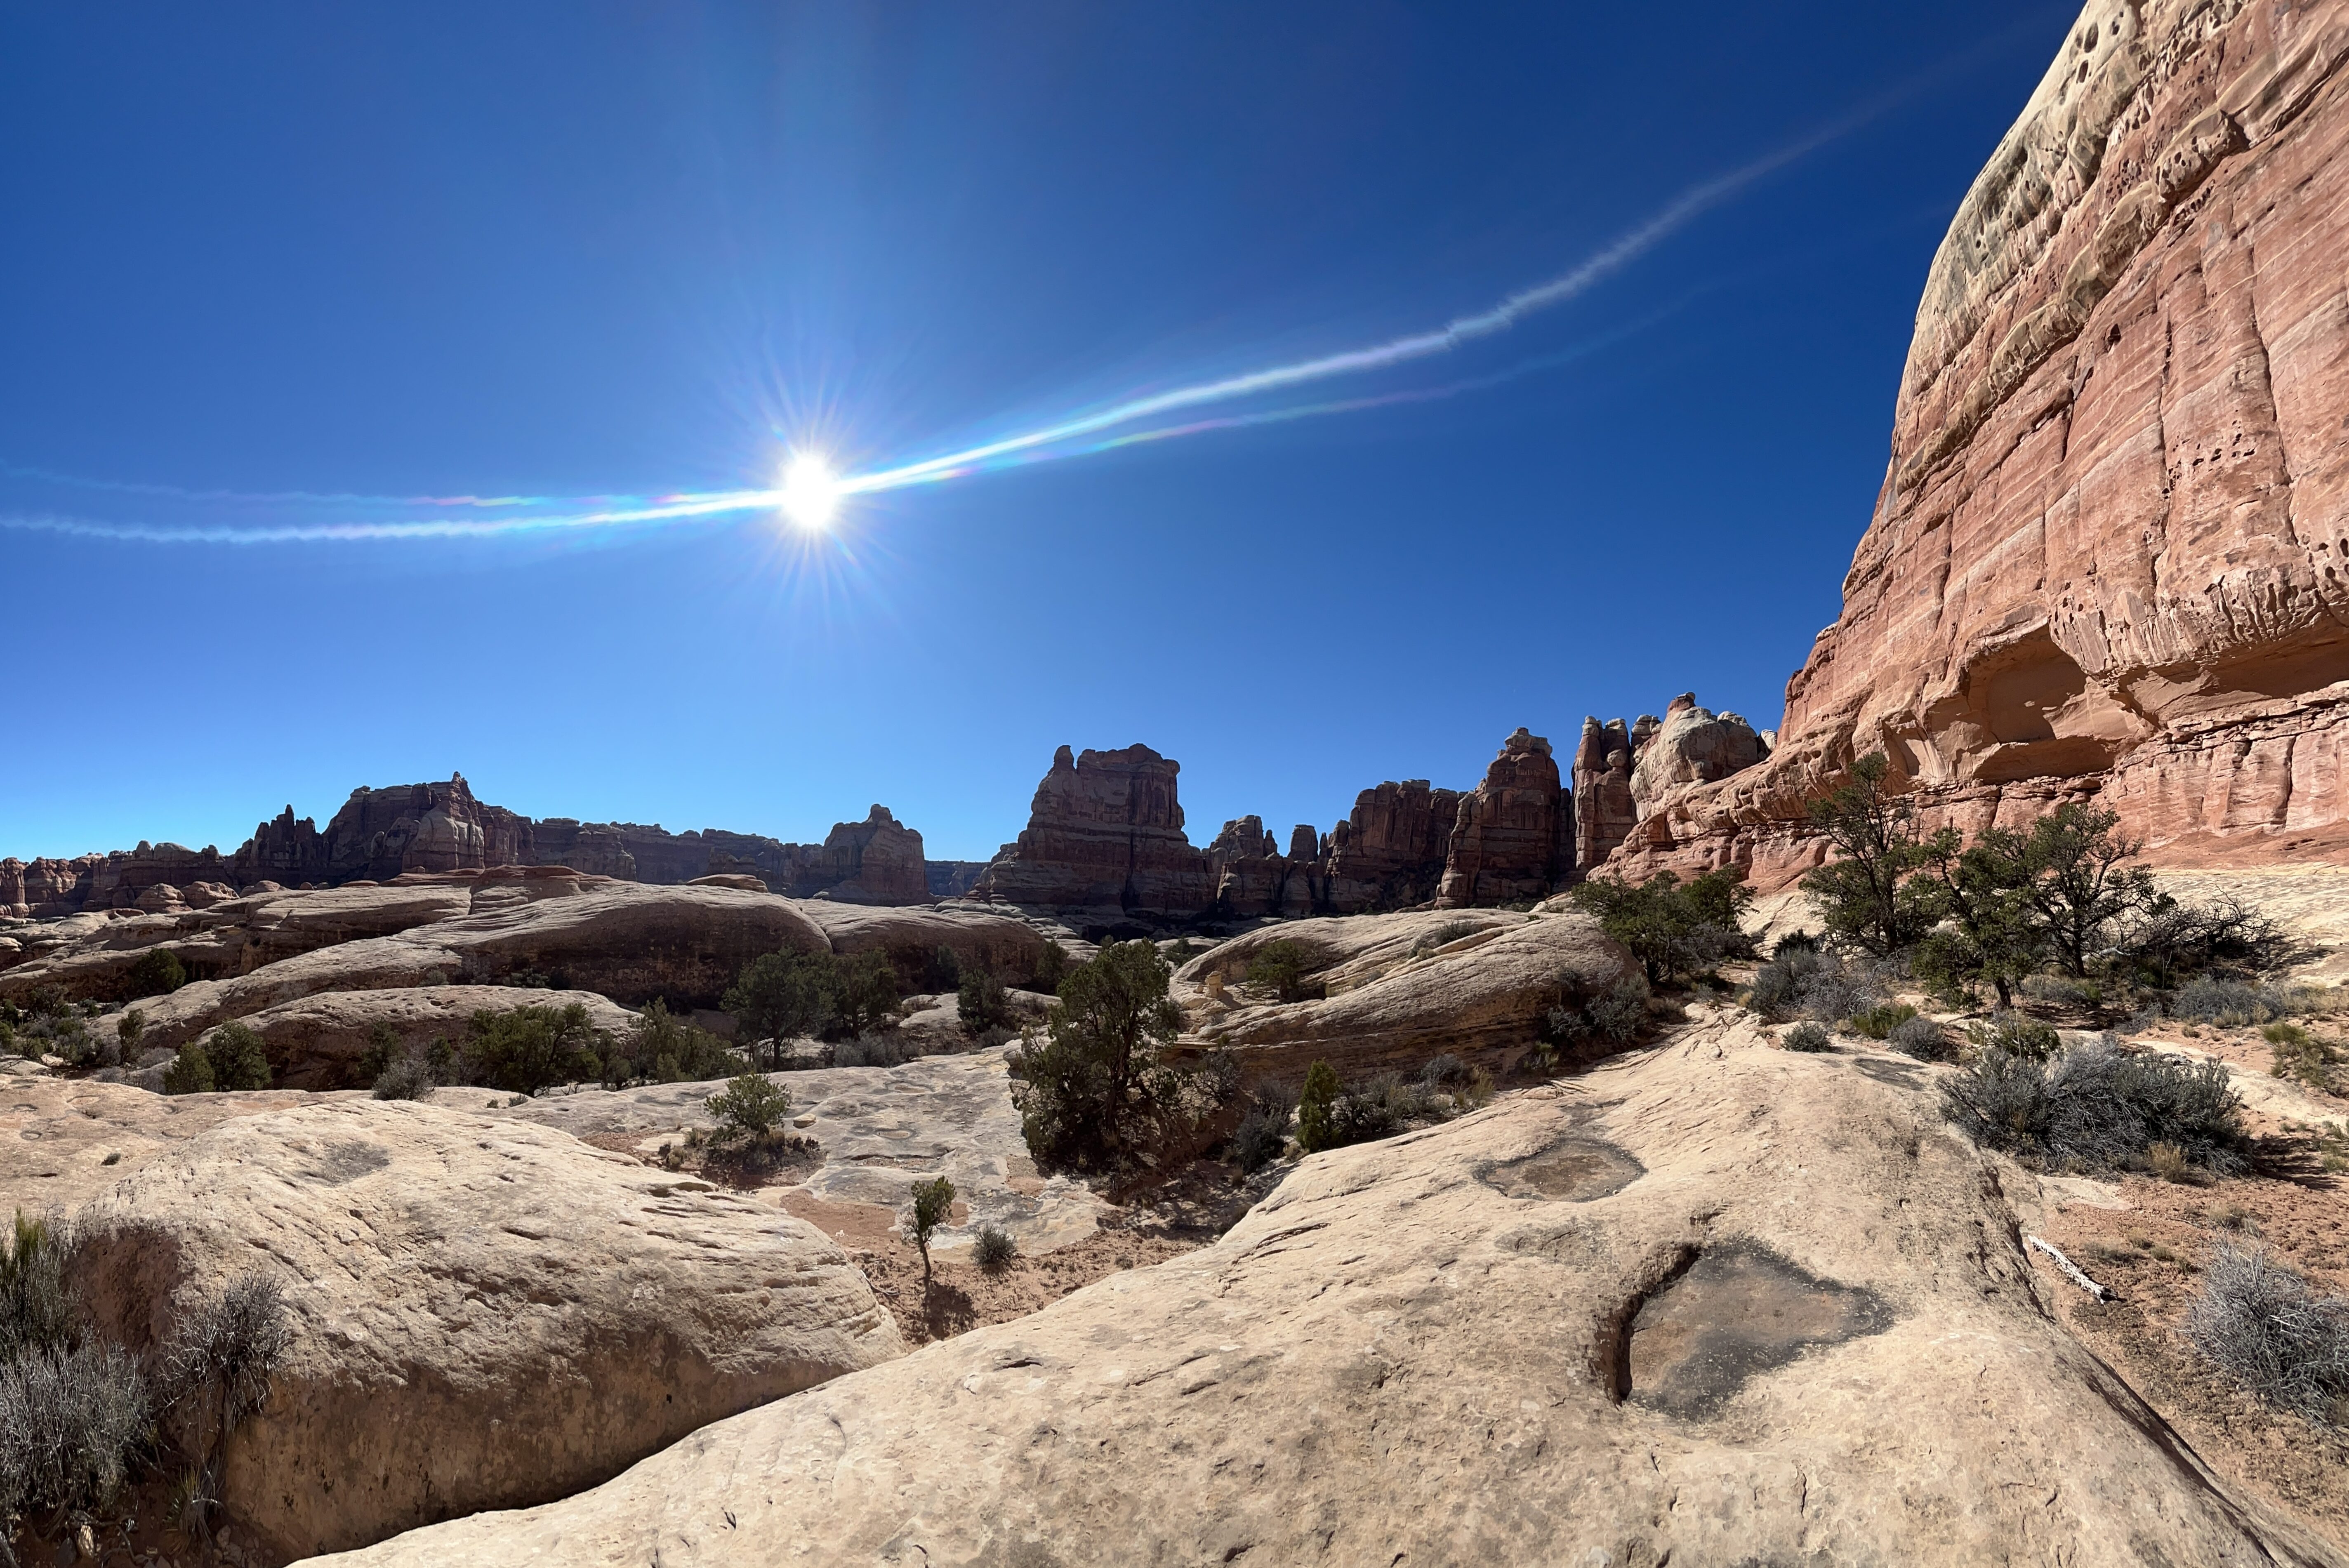
The Big Needles Loop encapsulates everything that makes The Needles District in Canyonlands National Park a must-visit destination. The district is famous for the colorful Cedar Mesa Sandstone pinnacles that punctuate the landscape and a predominance of slickrock trails.
One of many loops that can be put together linking shorter trails in The Needles, the Big Needles Loop traverses the best Canyonlands has to offer. The Trail takes in Peekaboo Creek, Upper Lost Canyon, Elephant Canyon, Druid Arch, Chesler Park Overlook andthe Joint Trail (which requires shimming through shoulder-width cracks in rock walls and boulders). In addition, there are several side trips you can take to add variety and distance to your trip, including the Salt River Canyon arches, the Devil’s Kitchen and the Confluence Overlook. The only limiting factor is the amount of water you can carry, particularly if you travel during peak season when water sources are scarce.
The Big Needles Loop can be tackled in either direction, but our trip follows a clockwise route through Upper Lost Canyon. You can also customize your route by starting at other trailheads or adding on side trips. This description covers the three-night/four-day option.
Quick Facts
- Distance: 23.7 miles roundtrip
- Days Needed: 3-5 days
- Peak Elevation:5,584 ft/1,782m
- Best Travel Time:April-May, End of September through November
- Permits: Required (see below)
- Difficulty: Moderate to Difficult
Highlights
- Multi-hued sandstone spires, fins, pillars and knobs, eroded by wind and water into phantasmic shapes
- Slot narrows, ladders and slickrock
- Wildlife: desert cottontails and black-tailed jackrabbits, kangaroo rats, antelope squirrels, lizards, snakes, hawks, and eagles
- Solitude during off-peak season
- Spectacular sunsets
Lowlights
- Very hot from Mid-May to end of September.
- Sudden storms; flash flooding during Monsoon season
- Few trees, little shade
- Scarcity of water
- Gnats, and deer and horse flies are plentiful following rainy spring season
- Trails can feel crowded, lots of day hikers during peak season
Best Time to hike
The best time to hike the Big Needles Loop is April-May or September to November. April and May temps highs range from 60 to 80 degrees and lows from 30 to 50 degrees, making it a very pleasant time to backpack. End of September through October bring day and evening temperatures similar to spring. Canyonlands is a located in a high desert, which means temperatures can swing 40 degrees in a single day. Check the weather report, bring layers and plan your trip in advance.
July-September temps reach over 100 degrees and late summer monsoons bring the threat of flash floods. Even rainfall in other areas can cause floods 50 miles downriver in side canyons, so be alert to weather changes during monsoon season.
Although it rarely snows in Canyonlands, winter temps rarely top 50 when the sun’s out and often slide below zero on winter nights. Even light snowfalls can make many trails super slippery and impassable, so be aware of impending weather.
Check in at The Needles District Visitors Center, or call them at 435 259-4711, before beginning your trip, or check the National Weather Service.
Difficulty
We rate most backpacking trips in this area as moderate to difficult due to many steep ascents, scarcity of water, and uneven trail conditions. Trails traverse a mix of slickrock benches and sandy washes; many of the more extensive trails rough and steep with plenty of exposure, including drop-offs, narrow spots, or ladders. Many trails are marked with cairns (small rock piles) rather than trail markers (major intersections are signed). Net elevation change is only several hundred feet or less, except for the Lower Red Lake Trail, which drops 1,400 feet to the Colorado River.
Although The Big Needles trails are not technically demanding, you should be prepared to climb ladders, descend steep rocky trails, and use some navigation skills. To prepare for this trip you’ll want to train properly, know your limitations, brush up on your skills, and dial in your gear. Doing so will make for a more safe and enjoyable adventure.
Permits
Permits are required for all backpacking trips into the backcountry in Canyonlands. Competition for permits can be stiff, especially during spring months. You can apply for backcountry permits at recreation.gov. Avoid reserving for nights you never intend to use (it limits options for other people trying to access those nights) and risks cancelation of your reservation.
Canyonlands charges a non-refundable reservation fee for each permit, whether they’re reserved in advance or in person at a visitor center. The cost is $36 per permit (non-refundable) plus $5 per person per night.
You also must pay a $30 entry fee (for each car) into the National Park at a park entrance station, visitor center, or online via pay.gov. Each vehicle, motorcycle, and individual entering the park by foot or bicycle must pay an entrance fee.
First Come First Serve Walk-Ins
If you didn’t secure a permit months out, you have another option. Unreserved dates and campsites may be available on a first-come, first-served basis at the visitor center, but it’s a gamble. If permits are available, you can try to get one up to the day before and the day of your desired trip date start. These are available up to one hour before the close of business each day, seven days a week at visitor centers.
Getting to Canyonlands National Park
Flying
Depending on where you’re coming from, there are two airports near Canyonlands National Park:
- GRAND JUNCTION REGIONAL AIRPORT: Flights from Salt Lake City, Denver, Phoenix and Dallas. A 4-hour drive to The Needles.
- SALT LAKE CITY INTERNATIONAL AIRPORT: Major airport with direct flights from many foreign and domestic destinations. A 6-hour drive to The Needles.
Driving
FROM SALT LAKE CITY, UT (244 miles): Take I-15 S toward Las Vegas. Merge onto US-6 E (exit 258) toward US-89 E Price/Manti. Take the US-191 S (exit 182) toward Crescent Junction/Moab. Turn right onto US-191 S to Moab. Drive 40 miles (60 km) south of Moab or 14 miles (22 km) north of Monticello, and take IT 211 roughly 35 miles (56 km) west. UT 211 ends in The Needles, and is the only paved road leading in and out of the area.
FROM LAS VEGAS, NV (467 miles): Take I-15 N toward Salt Lake City. Take exit 132 for I-70 E. Take exit 182 toward Crescent Junction/Moab for US-191 S. Turn right onto US-191 S to Moab. Drive 40 miles (60 km) south of Moab or 14 miles (22 km) north of Monticello, and take IT 211 roughly 35 miles (56 km) west. UT 211 ends in The Needles, and is the only paved road leading in and out of the area.
The Needles visitor center is open daily 8-5pm from early March to late November. The phone number is 435-259-4711 ext. 0. Toilets and water are available year round.
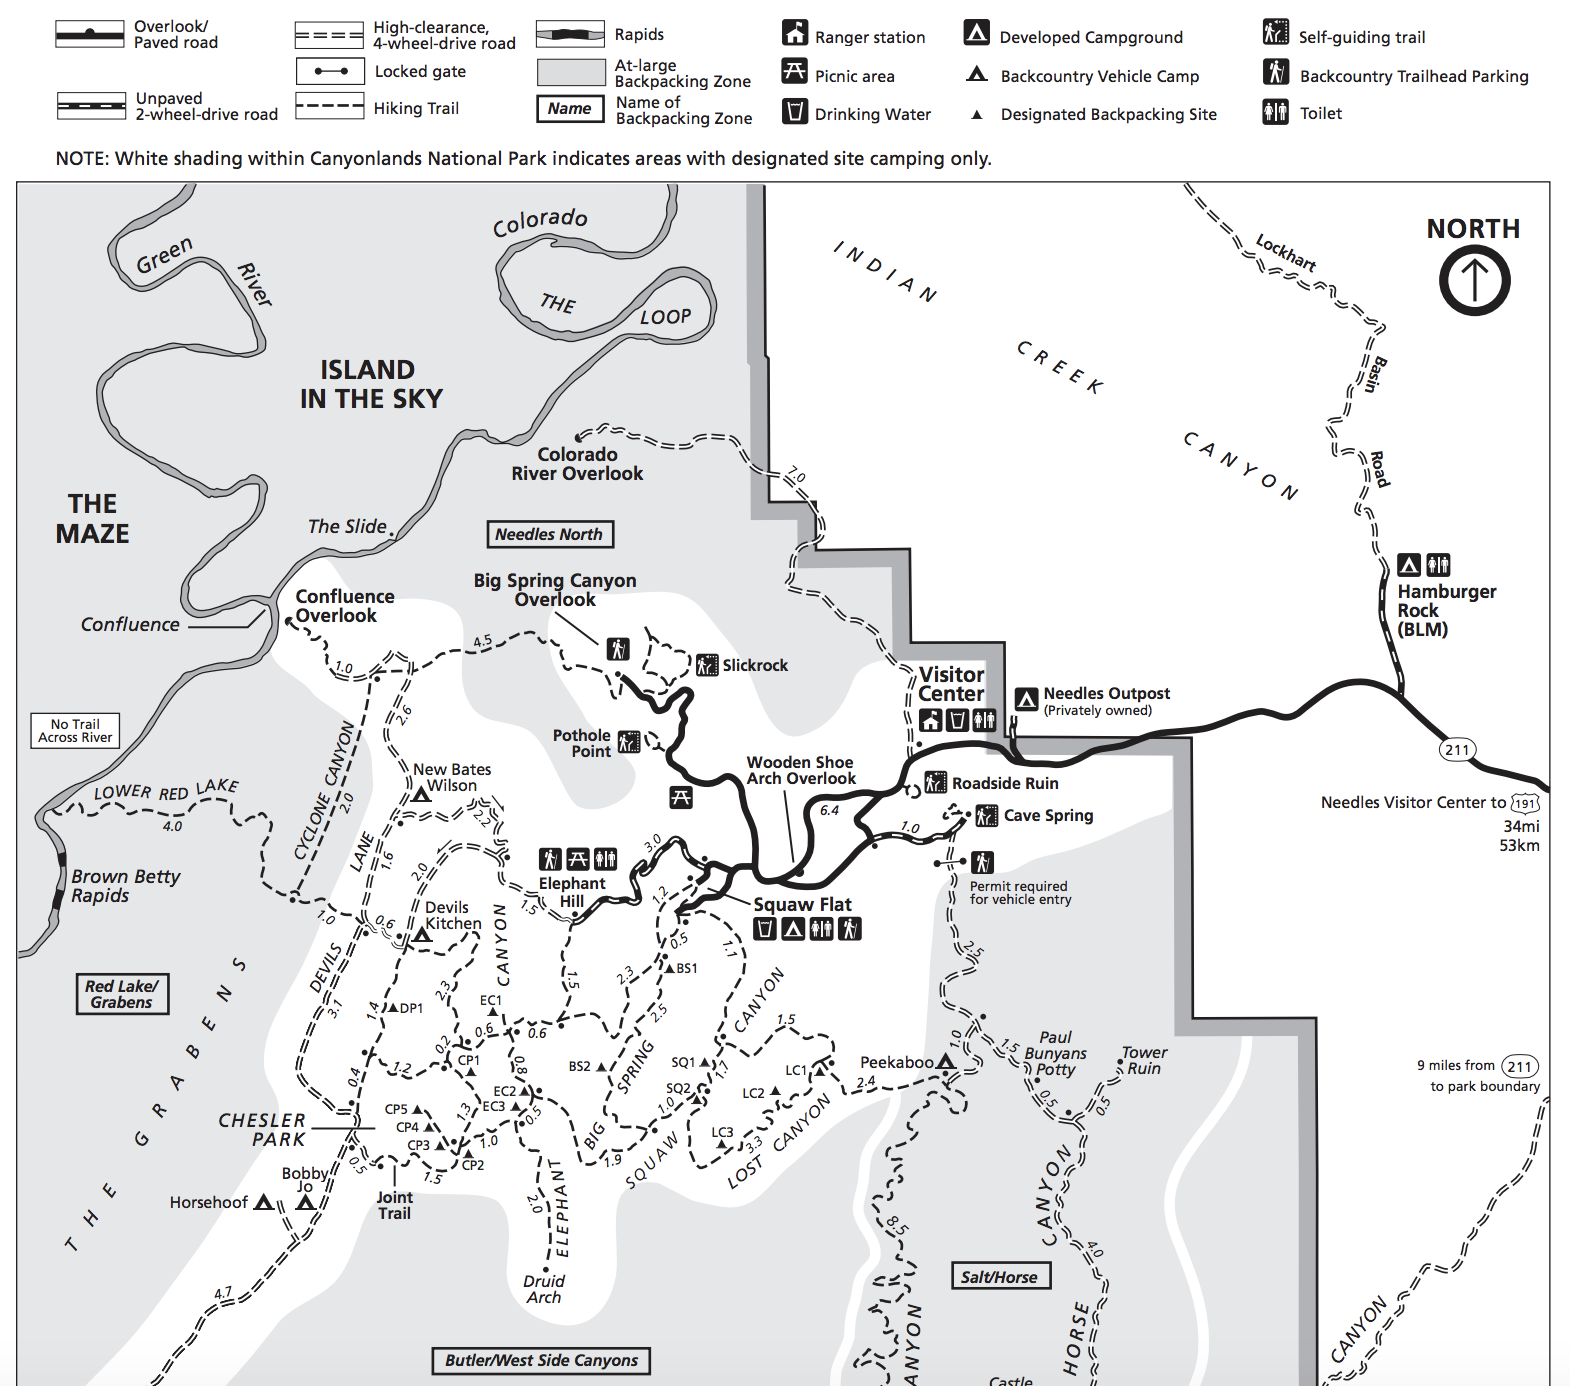
Getting to Squaw Creek Trailhead
The Big Needles Loop starts and ends at Squaw Creek Trailhead and traverses a variety of trails to end back at the same trailhead. It’s a classic loop trail that can be traversed in either direction, however for the sake of this guide, we’ll outline the clockwise route through Upper Lost Canyon.
From Moab, UT and Monticello, UT: Head south on U.S. Highway 191 for roughly 40 miles to Utah Highway 211 (signed for Canyonlands National Park, Needles District) and turn right (west). Follow Utah Hwy 211 west for 37.2 miles and turn left (west), on the road signed for the Squaw Flat Campground, about 2.8 miles beyond the Visitor Center. At the first intersection (0.3 miles) continue on Campground Loop A road for 0.9 miles (Note: Pay attention! It’s easy to mistakenly turn on to Campground Loop B road.the left-hand fork takes you to the trailhead with the shortest access route to the backcountry. The right-hand fork and its respective trailhead are used mostly by campers staying in the campground.) The parking area for the Squaw Flat Trailhead is located on the left (south) side of the road.
From Blanding, UT: Head north on U.S. Highway 191 for roughly 34.8 miles to Utah Highway 211 (signed for Canyonlands National Park, Needles District) and turn left (west). Follow Utah Hwy 211 west for 37.2 miles and turn left (west), on the road signed for the Squaw Flat Campground, about 2.8 miles beyond the Visitor Center. At the first intersection (0.3 miles) continue on Campground Loop A road for 0.9 miles (Note: Pay attention! It’s easy to mistakenly turn on to Campground Loop B road.) The parking area for the Squaw Flat Trailhead is located on the left (south) side of the road.
The Hiking Route
You’ll start your hike at Squaw Creek Trailhead and heading clockwise, you’ll traverse 1.1 miles along relatively easy terrain until you hit the junction with the Peekaboo Trail. Turn left and travel 1.5 miles until you hit the Lost Canyon junction. Take a right to head southwest into the Lost Canyon.
As you head up the Lost Canyon, keep your eyes open for a sign pointing to Squaw Canyon Trail. You’ll eventually hit the trail junction in the Elephant Canyon with the Druid Arch. This is a worthwhile out-and-back trip.
When making the trip to Druid Arch on your way to Chesler Park via the Lost Creek Trail connector, stash your pack. The trail (an extension of Elephant Canyon) is often difficult to follow with no shade and lots of sand to slog through. Instead, when you reach the junction of Chesler Park and Druid Arch trails, tuck your pack away somewhere off-trail near the trails’ junction and the head south on the Elephant Canyon/Druid Arch Trail with a food and water in a day pack.
When you return to the junction where you stashed your pack, take the right fork (southwest) and go another mile to Chesler Park backcountry campsites. The next day, head southwest on the Joint Trail. A short while later a side trail heads left to the Chesler Park Overlook. This junction is a good place to stash your pack again and follow cairns .25 miles to the overlook. From the vantage point of the slickrock ledge you can take in a dramatic view of Chesler Park and the ring of “needle” rock spires that envelop it.
Return to your pack and head into the Joint — a traverse through a deep narrow fissure between rock walls, and the longest slot in the park about .25 miles. After negotiating it you’ll follow the route on a sandy low-traffic 4WD road for about half mile until you see a road on the left coming out of Beef Basin. Go right for another 0.3 mile until you see the Devils Pocket Trail forking to the right (north). After 0.8 mile you’ll meet the Chesler Park Loop Trail junction veering east. Go left here and make a fairly serious climb through a pass through the Big Needles. After the pass the trail drops into the Devil’s Pocket.
In a half mile or so,a side trail takes you to the trail to backcountry campsite DP1. The campsite is about .25 mile further. Another option is to stay on the trail and continue on past Devil’s Kitchen, veering east back toward the Chesler Park loop and onto Elephant Canyon C1. Be careful here – it’s fairly easy to get lost in this confusing area. As you traverse the Big Needle’s Loop, always check your topo map and compass to make sure you don’t have to backtrack to find the official trail.
Below is a map to follow the route listed above, including the backcountry campsites. More on campsite planning below.
Trip Planning
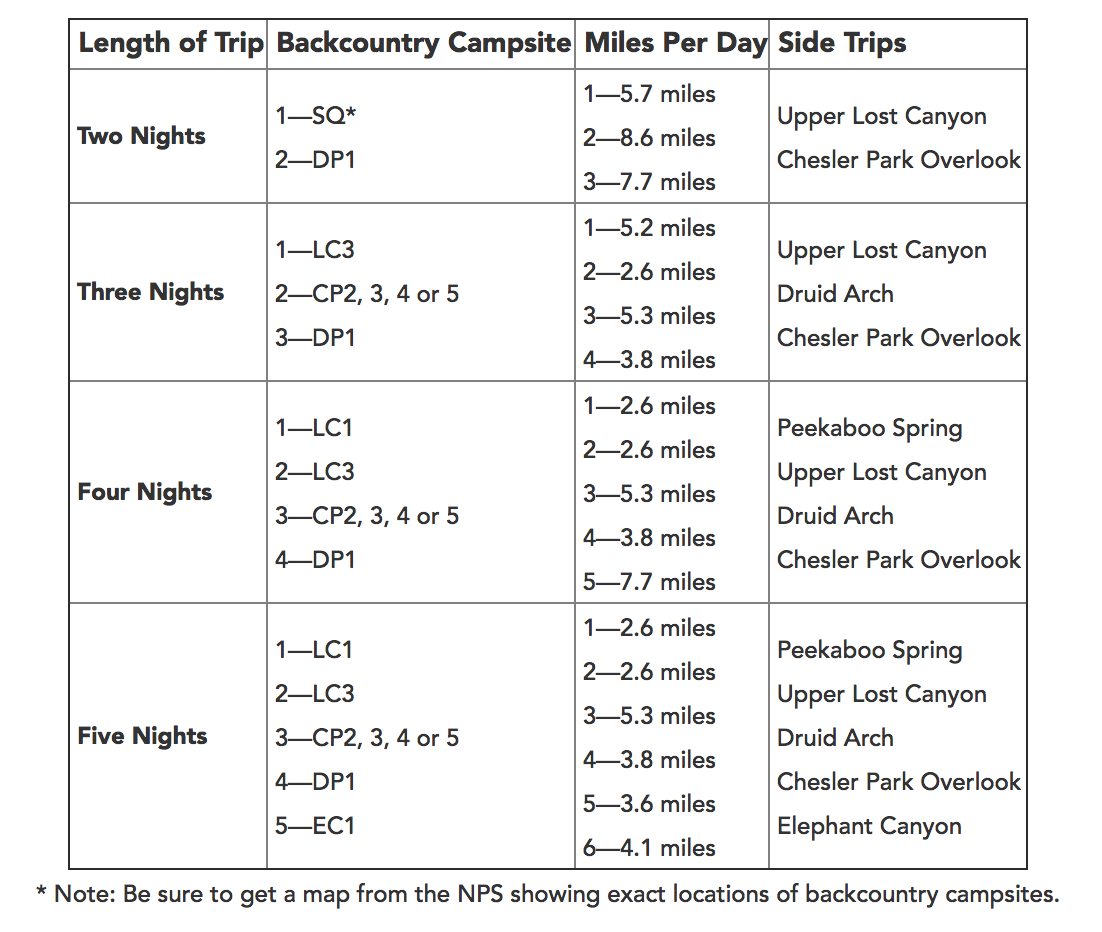
The first thing you’ll want to decide is how many days you’re going to take to complete the loop. It’s important to keep in mind that, depending on the season, you may need to carry all of your water. This may dictate how many days you choose to complete the loop.
Although the daily mileage may seem small on the itineraries listed below, it’s important to note that this terrain and landscape will take you longer to cover than typical trail mileage. That said, you can always adjust your itinerary based on your preference, physical fitness and trail plan. Below are sample itineraries from VisitUtah.com that outlines daily mileage, backcountry campsites, and potential side trips.
Backcountry Campsites
Backpackers in The Needles are required to stay in designated campsites with the exception of lower Salt Creek Canyon. You’ll reserve each campsite online during the permitting process. See the map and trip planning guide above for planning each backcountry campsites.
Nightly camping fee for an individual site is $20. You can reserve some individual sites in spring and fall. Other times of the year, individual sites are first-come, first-served. Sites fill quickly during peak season.
Maps & Guidebooks
Canyonlands National Park – National Geographic Trails Illustrated Map, – This detailed topographical map is printed on foldable, water-resistant paper and provides essential details including trail mileage and trailhead access points for the entire park.
Needles District: Canyonlands – National Geographic Trails Illustrated Map – This map has the same qualities listed above, however covers only the Needles District, offering more in-depth coverage of this section of the park.
Canyonlands National Park Map Pack Bundle – National Geographic Trails Illustrated Map – If you plan on exploring all three districts in Canyonlands – Islands in the Sky, the Maze, and the Needles – this map pack is your best bet.
Hiking Canyonlands and Arches National Parks: A Guide To The Parks’ Greatest Hikes – This book provides good overview of the Canyonlands and Arches National Parks visual opportunities and essential boots-on-the-ground information. No book singularly covers The Needles District, but this one gives you plenty of trail information to design your own trip.

Water
Water is a scarce resource on the Big Needles Loop. Springs are scattered throughout the park, mostly in canyon bottoms, but many of them marked on topographic maps dry up during summer and even other seasons during periods of drought.
The park service highly recommends backpackers pack in water whenever possible, especially larger groups (4 or more) who will find some springs providing just a trickle at certain times of the year.
If you find yourself backpacking the Big Needles Loop in a time when there are springs available, you’ll need to purify all water collected in the backcountry. A lightweight water filter or chlorine dioxide drops or pills would work as well.
Regulations
- Bury human waste in a shallow hole at least 100 feet from any water supply, so that rain or snow runoff will not carry contaminants into lakes and streams. Body waste decomposes fastest in holes dug 6-8 inches deep.
- Soap (even biodegradable brands) and food particles pollute lakes and streams. Do not wash your dishes, clothes and yourself near the shore of lakes, ponds or streams.
- Wood campfires are not allowed in the backcountry.
- You must pack out all trash, including toilet paper, from the backcountry.
- Store all your food securely to prevent animals from gaining access to it.
- Keep all camping activities within campsite boundaries at designated sites. Camps in at-large zones must be one mile from a road and in low-impact areas like slickrock.
- Camping within 300 feet of an archeological site, historic site, or water source is forbidden.
- All natural objects and cultural artifacts are protected and must be left where they are found. Touching rock art and drawing graffiti is forbidden.
- Pets, discharging firearms, hunting, and feeding wildlife are prohibited.
- Caching food, water, or supplies is allowed with written notification of the district ranger. No damage to resources may occur and all items must be removed.
- Swimming or bathing is only allowed in the Green and Colorado rivers.
Trail Etiquette
The trails in The Needles are constructed and maintained to minimize impact of human use. Please be especially aware of the following:
- Shortcutting switchbacks and cutting across an arid landscape can damage plant life (biological soil crusts, aka biocrusts) and cause soil erosion. Biocrusts are tangled masses of mosses, lichens and cyanobacteria that soak up water like sponges when it rains, slowing down runoff and helping store water for arid plants. Always use trails provided; don’t create new ones.
- Hikers meeting horse parties on the trail should move a considerable distance off the trail and remain quiet and motionless until the horses pass, unless advised otherwise by the riders. Colorful backpacks, curious dogs, clicking trekking poles and any sudden noise or movement may cause a horse to spook, resulting in injury to horses, riders and hikers.
Food Storage
There are no food storage requirements for this area, but we recommend always packing your food in an Ursack to protect your provisions from ‘mini bears” like ravens, mice and small rodents. They can peck or chew into packs and tents left unattended. Follow proper food storage techniques and this shouldn’t be a problem. To learn more about food storage, check out our Food Storage video.
Bugs
Mosquitoes, cedar gnats, and deer flies all make their presence felt in Canyonlands’ backcountry during wet years, and typically always in the early spring. Use a combination of permethrin on your clothing and a small amount of DEET or the less harsh Picaridin on exposed skin for full protection.
Gear List
Make sure to check out our Ultimate Backpacking Checklist so you don’t forget something important.
Below you’ll find our current favorite backpacking gear. If you want to see additional options, our curated gear guides are the result of many years of extensive research and hands-on testing by our team of outdoor experts.


